https://pagead2.googlesyndication.com/pagead/js/adsbygoogle.js?client=ca-pub-9463394879326171 crossorigin="anonymous">

Author name: Louis Dioso

How To Declutter Your Bedroom Properly

How To Declutter Your Bedroom Properly

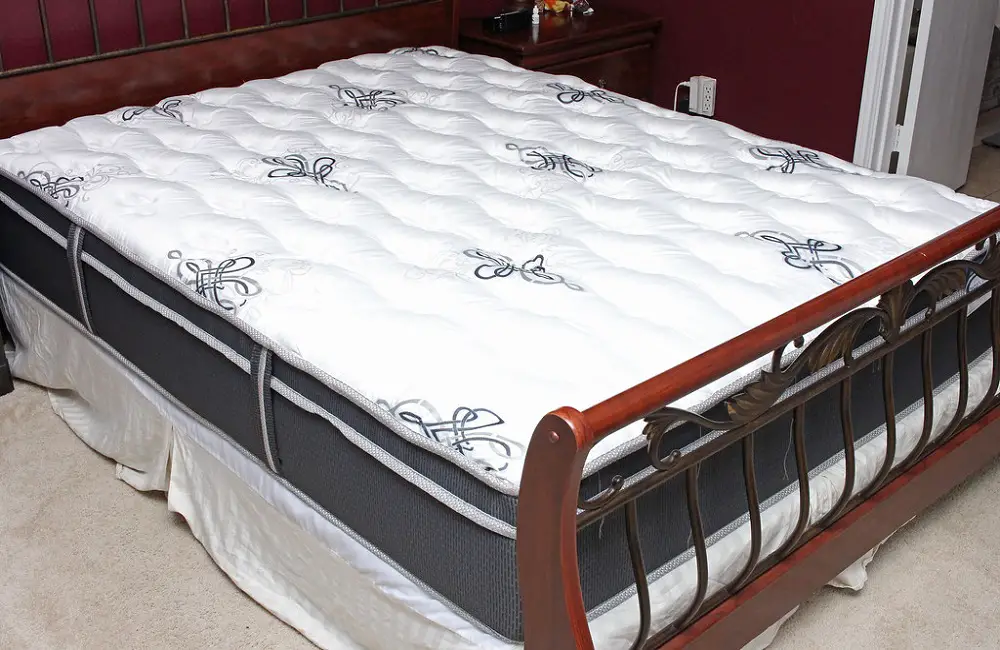
Your bedroom is a sanctuary in your home, providing a space for relaxation and unwinding. However, when your bedroom becomes cluttered with a mix of clean clothes, dirty clothes, stacks of books or magazines, and scattered makeup and jewelry, it can significantly diminish its comfort and appeal.  If you find your bedroom no longer providing the desired comfort, it may be time to take action and declutter. Read further to explore effective tips and strategies on how to declutter your bedroom, transforming it into a serene and inviting space. 7 Tips on How to Declutter Your Bedroom Start With the Obvious When beginning the process of decluttering your bedroom, it is recommended to start with the larger pieces of furniture that may be scattered around. This typically includes clothing, robes, and similar items. To start, gather all the clean clothes and either hang them up in your closet or neatly place them on shelves or in your dresser drawers. Next, collect all the dirty clothing and place it into a designated laundry basket to be washed later. Creating a designated space, such as a hamper, for placing dirty clothes instead of leaving them on the floor, will significantly contribute to maintaining a clutter-free bedroom. Additionally, it is advisable to arrange nightgowns and robes on hooks specifically designed for that purpose. These hooks can be conveniently placed within reach for easy access. By following these steps, you can effectively declutter your bedroom and create a more organized living space. Get Rid of the Paper Clutter It is recommended to avoid storing bills or letters in your bedroom, as these documents can accumulate and clutter your surfaces such as stands and dressers.  Instead, establish a designated area in another room of your home to store bills. Alternatively, consider opting for paperless billing, which eliminates the need for physical documents altogether. If you happen to have bills or other papers in your bedroom, take the time to review them thoroughly and discard any unnecessary papers. Organize the remaining bills and store them in a designated spot to ensure they are easily accessible when needed. Remove that Pile of Books and Magazines To effectively manage your reading materials, it is advisable to focus on one book or magazine at a time. Select the book or magazine that you are currently reading and organize the remaining books in a bookcase, while placing the magazines you plan to read in a magazine rack. Remember to gather all the books and magazines scattered around your room. For those that you have finished reading, consider placing them in a box labeled “recycle” or “give away”. Put All Your Jewelry Away Please gather the following items: a pair of earrings from your nightstand, a necklace from your vanity, and bracelets from the top of your dresser. Place them carefully into your jewelry box or any designated area where you typically store your jewelry. Ensure that you thoroughly search for and collect all of these items. However, if you happen to overlook any during the process, retrieve them and promptly place them in their respective locations. Put All of Your Make-Up Away Please ensure that you tidy up your vanity area by picking up all of the makeup items and storing them neatly in the designated drawers or any other appropriate location.  Additionally, remember to organize your brush, comb, hair dryer, and curling iron, so that your vanity appears neat and well-maintained.  Finally, it is advisable to dispose of any expired makeup as well as any items you no longer require or utilize. Based on industry recommendations, it is advisable to keep track of the expiration dates of various make-up products. This time guideline will assist you in ensuring the optimal usage of your cosmetics: By following these guidelines, you can ensure the optimal usage and safety of your make-up products. Clean off Your Stands Please proceed to tidy your room by removing any excess clutter from your stands. Specifically, ensure that the stand adjacent to your bed is cleared and prepared to exclusively accommodate your cell phone or glasses, and perhaps even a glass of water. Declutter Your Closet and Dresser as Needed If you haven’t already done so, it is highly recommended to declutter your closet and dresser. By taking the time to do this, you can create a clutter-free and organized bedroom that will significantly enhance its overall comfort.  Begin by emptying the drawers one by one and carefully evaluate each item. Discard anything that you no longer need or no longer like, such as socks with holes or those without mates.  Additionally, be sure to remove underwear that has lost its elasticity or any other items that are no longer in good condition. Things you can Get Rid of Right Now That You won’t miss! Conclusion Ensuring a clutter-free and tidy bedroom is imperative for optimal sleep and relaxation. Therefore, learning how to effectively declutter your bedroom serves as the initial step towards achieving the desired tranquil and organized space you seek for unwinding and recharging.

How To Declutter Your Bedroom Properly Read More »

Small Bathroom Organization Hacks

5 Small Bathroom Organization Hacks

The bathroom, being one of the smallest and frequently cluttered rooms in a home, poses challenges in maintaining tidiness and order. This disarray not only presents an unsightly appearance but also hampers efficiency in daily tasks such as preparing for work or other events, resulting in wasted time searching for misplaced items or rearranging belongings.  Consequently, it becomes essential to declutter the bathroom before embarking on organization efforts, as this simplifies the task at hand and ensures smoother efficacy. To aid in streamlining the organizing process, we present a collection of highly effective bathroom organization hacks.  These hacks offer practical solutions to achieve a well-organized bathroom promptly and with budget-friendly approaches that may exceed your expectations. 5 Simple Ideas for Organizing Your Small Bathroom There are several effective methods available to maximize bathroom storage space at minimal cost. Here, I will share a few practical ideas that you can consider implementing in your own bathroom. By following these suggestions, you can efficiently organize your bathroom essentials and optimize the available storage area, resulting in a more functional and clutter-free space. Over the Toilet Storage When it comes to optimizing bathroom space, the area above your toilet is often overlooked. However, there are numerous storage solutions that not only maximize functionality but also enhance the overall appearance of your bathroom. One option is to choose from a variety of prebuilt storage units available in the market. These units typically offer two or three shelves, along with a small cabinet, providing ample storage for items such as towels, toilet paper rolls, shampoos, soaps, and more. Please note that some units have legs that fit closely next to the toilet tank, which may pose challenges during cleaning. If you prefer a more customized approach, you can construct your own shelves or purchase pre-cut shelves and shelf brackets. By doing so, you can eliminate the need for legs, ensuring a clean and seamless design.  Another affordable and aesthetically pleasing alternative is to buy towel racks and wicker baskets. Attach the baskets to the towel rack using ribbon or S hooks, allowing for the installation of multiple baskets above the toilet.  These baskets serve as ideal storage solutions for items such as towels, toilet paper, hair dryers, shampoo, conditioner, and body wash. Alternatively, you can directly attach wicker baskets to the wall, eliminating the need for towel racks. This option provides a simple yet effective storage solution. For items that you prefer to keep hidden until needed, consider building a recessed storage space within the bathroom wall.  By utilizing the space between studs, which is typically around 16 inches, you can create a discreet storage compartment for concealment of items like plungers, toilet bowl brushes, and cleaners. This hidden storage area can blend seamlessly with the surroundings, remaining unnoticed unless you know where to look. With these creative storage ideas, you can make the most of the space above your toilet while optimizing organization and adding a touch of functional elegance to your bathroom. Simple and Easy Bathtub or Shower Storage Having ample storage space in your bathtub or shower is crucial for maintaining functionality and organization in your bathroom. There are several effective methods for increasing storage capacity in your shower or tub. One option is to utilize corner shower shelving or an over-the-shower-head shower caddy. These solutions provide small shelves where you can conveniently place items such as soap, shampoo bottles, and other shower essentials. If you require additional bath or shower storage beyond what these caddies offer, you can consider creating your own storage setup. One approach is to install an extra shower curtain rod and attach a few mesh fruit bags and plastic baskets to it. The mesh bags are ideal for storing kids’ bath toys, as well as loofahs and other accessories.  The baskets can hold items like shampoo, conditioner, soap, and any other necessary products. The versatility of this setup allows you to adjust the rod’s height to accommodate either your shower or tub. By implementing these storage solutions, you can enhance the functionality and organization of your bathroom, ensuring that everything you need is within reach while keeping clutter at bay. Turn the Back of Your Bathroom Door into Extra Storage One way to maximize storage space in your bathroom is by utilizing the back of the bathroom door. Depending on your specific needs, there are various options to consider. Firstly, if you’re looking for a convenient place to hang your bathrobe or pajamas while you bathe or shower, installing a small coat rack or hooks on the bathroom door can be highly beneficial. This allows you to keep your bathrobe easily accessible yet out of the way. Additionally, using an over-the-door shoe caddy with clear pockets can offer an abundance of storage for various bathroom essentials. From hair brushes and combs to curling irons, shampoos, soaps, toothbrushes, and even makeup, the shoe organizer provides ample space to keep everything tidy and easily accessible. Furthermore, if you require extra towel storage, there are a couple of options. You can either utilize towel holders to hang or store additional towels, or repurpose an old wine rack by rolling your towels and placing them in the rack. When considering which option to implement, it’s important to take into account the amount of existing storage space available and determine your specific storage needs. By capitalizing on the back of your bathroom door, you not only optimize storage capacity but also keep your bathroom organized and clutter-free. Making the Most Use Out of Your Sink Cabinet When it comes to maximizing the functionality of your sink cabinet, there are several effective methods that you can consider. Let’s explore a few examples: Apart from the sink cabinet’s interior, don’t forget to utilize the door as well. Here’s a great tip: attach a couple of PVC pipes to the inside of the cabinet door to conveniently hold your curling iron and brush. Additionally, make use of an over-the-door towel holder on the outside

5 Small Bathroom Organization Hacks Read More »

Ways To Brighten A Dark Room Easily

9 Ways To Brighten A Dark Room Easily

If you reside in an older home, it is probable that you have a room that lacks adequate lighting. You may be interested in finding uncomplicated methods to enhance the brightness of this dark room without investing significant effort into remodeling. If you are seeking ways to transform that dim, dungeon-like room into a more illuminated space, allow me to suggest a few tricks that you can try out. 9 Tips on How to Brighten a Dark Room Make Full Use of Natural Light One of the simplest and most effective ways to brighten a dark room is by maximizing the use of natural light. This can be achieved by taking into consideration the position and number of windows in the room, as well as their size. Regardless of window size, there are steps that can be taken to enhance the amount of natural light in any space. First and foremost, it is important to evaluate the surroundings of the windows in the room. Check for any obstructing elements, such as tree branches, that may inhibit the flow of light into the window. If necessary, consider trimming back branches to allow for more light to enter. In addition to clearing any obstacles, selecting appropriate window treatments can greatly impact the access of natural light. Opting for semi-sheer curtains, for instance, can facilitate a soft and filtered light to permeate the room, creating a bright and inviting atmosphere. By implementing these strategies and being mindful of the room’s specific characteristics, it becomes possible to significantly enhance the natural light in a space, transforming it into a more vibrant and welcoming environment. Reflect the Natural Light From Your Window One way to brighten a dark room is by strategically placing a mirror opposite the window. This allows incoming light to bounce back, effectively providing additional illumination similar to that of an extra window.  Consider options such as positioning a large mirror over a stand or sofa, or opting for a sizable piece of mirrored wall art. These choices will effectively reflect and amplify the incoming light, brightening up the room even more. Paint Your Ceiling White To enhance the brightness of a dark room, consider painting the ceiling white using high gloss paint. The reflective nature of white paint ensures that light is bounced back into the room, resulting in a heightened sense of brightness. On the other hand, a dark painted ceiling absorbs light, making the room appear even darker.  If your ceiling does not have wall trim, you can extend the white ceiling paint a few inches down the wall to further contribute to the brightening effect and create an overall feeling of lightness in the space. Keep the Walls of the Room Light To enhance the overall ambiance of a room, consider opting for light-colored walls instead of rich dark colors. Pale shades like pale yellow, pale green, or a light blue can significantly brighten up the space and uplift the overall décor. If you prefer a white walled room, you can introduce a touch of color by painting the trim around the door and windows in a bright shade. When selecting a paint finish for light-colored walls, it is advisable to choose flat or semi-gloss paint. This is because a high gloss finish may result in glare instead of effectively brightening up the room. Use Parameter Lighting One effective technique to brighten up a dark room is by employing a simple lighting trick. Additionally, consider replacing the overhead light with strategically placed soft ambient lighting sources.  You can incorporate floor lamps, table lamps, and sconces to achieve a well-rounded lighting scheme for your room. For optimal brightness, make sure that the light from these lamps reflects upward onto the walls.  Furthermore, explore wall lamps and sconces that offer two or even four-way lighting options, enabling you to effectively illuminate the walls from both the top-down and side-to-side directions. Limit the Amount of Furniture Placed in the Room Limiting the amount of furniture in your room can actually make it appear lighter and brighter. When there are fewer large pieces of furniture, the room not only looks larger but also allows more natural light to flow through. By strategically reducing the number of large pieces of furniture in your room, you can create a spacious and well-lit environment. This can contribute to a more airy and inviting atmosphere, enhancing the overall aesthetic appeal of your space. Keep Your Large Furniture as Light as Possible To maintain a visually light and airy ambiance in your living space, it is advisable to opt for furniture in lighter colors. While this preference doesn’t necessarily restrict you from having a floral sofa if that’s your preference, it is recommended to select a sofa with a white or light background adorned with floral patterns rather than one with a dark background. In the event that you already possess a dark sofa that needs to be incorporated, you can enhance its appearance by adding light-colored throw pillows or draping a light throw over the back of the sofa. Moreover, if your bedroom exhibits a dark aesthetic and you have a dark bed, consider choosing a light-colored quilt to contribute to a brighter overall look for your furniture. Lighten Up Your End Tables and Coffee Tables To create a visually spacious and brightened room, it is recommended to keep your end tables, coffee tables, and bookcase as light as possible. One effective approach is to choose white furnishings, as it not only lightens the room but also adds a touch of elegance.  Additionally, for a more modern aesthetic, consider opting for acrylic end tables and coffee table, as they create an illusion of lightness and further enhance the room’s overall brightness. Go With Gold or Silver Accents Utilizing the gleaming allure of gold or silver can effectively enhance the brightness of a room. Consider incorporating gold or silver lamps and accents to create a luminous effect in darker spaces. Another creative approach is to apply

9 Ways To Brighten A Dark Room Easily Read More »

How To Clean Your House With Lemon

How To Clean Your House With Lemon

Using lemon for cleaning has multiple benefits. Not only does it provide a fresh citrusy scent to your home, but it is also an all-natural alternative to chemical cleaning products. As more and more people strive to lead eco-friendly lives, they are opting for natural cleaning agents like lemons instead of harsh chemicals. When it comes to cleaning with lemons, lemon juice is usually the key component. You can extract lemon juice directly from fresh lemons or use pre-packaged lemon juice from a jar. If you prefer to minimize your environmental impact, using fresh lemons is the most eco-friendly option. Cleaning with lemons offers a wide range of possibilities. Incorporating lemons or lemon juice into your cleaning routine can be highly effective. So, why not give it a try and embrace a more natural approach to cleaning your home? 7 Effective Ways to Use Lemon to Clean Your House Clean Wooden Cutting Boards To effectively maintain and clean wooden cutting boards, follow these steps: By following these steps, you can maintain the cleanliness and longevity of your wooden cutting board. Bleach Replacement in Laundry To enhance the stain-removing power of your laundry, consider replacing bleach with a cup of lemon juice. Lemon juice effectively cuts through stains, leaving your clothes with a refreshing lemony scent.  For stubborn stains, you can further boost the stain-removing process by setting your clothes in direct sunlight. Clean Your Microwave with Lemon To effectively clean your microwave using lemon, follow these steps: Hard Water Deposits To effectively remove hard water deposits, consider rubbing half a lemon on shower doors and other areas prone to buildup. Ensure to thoroughly rinse the surfaces with warm water after the deposits have been removed. This natural and simple method can effectively eliminate stubborn mineral deposits, leaving your shower doors and surfaces sparkling clean. Glass Cleaner To prepare an effective cleaner for glass surfaces and disinfecting various areas of your house, including kitchens and bathrooms, follow these steps: This mixture offers exceptional cleaning properties and ensures a pleasant experience throughout your home. Remove Stains on Plastic Plastic containers often retain stubborn stains, particularly those caused by pasta. However, there’s a simple solution: lemons! Squeeze a lemon into the container and sprinkle a small amount of baking soda.  Thoroughly rub the mixture into the stained areas of the plastic. For more severe stains, it might be necessary to leave the mixture to sit overnight. By following this method, you can effectively remove those persistent stains and restore the container’s cleanliness. Clean the Garbage Disposal After utilizing your lemons, don’t forget their usefulness in cleaning the garbage disposal. When ground up, they effectively eliminate odors, leaving behind a pleasantly fresh aroma. This simple yet effective method ensures optimal cleanliness and a delightful scent in your kitchen. Final Verdict To maintain a clean and healthy home, it is unnecessary to rely on chemical cleaners. Instead, there are numerous natural ingredients readily available that can effectively fulfill this purpose. As a proponent of natural health, I firmly believe that minimizing our exposure to chemicals is vital for safeguarding our well-being. By using lemon as a natural cleaning agent, not only can you achieve a consistently clean and fresh home, but you can also significantly reduce your exposure to toxic chemical cleaners. Incorporating this eco-friendly alternative into your cleaning routine will not only benefit your health but also contribute to a sustainable environment.

How To Clean Your House With Lemon Read More »

How To Clean Your Mattress

How To Clean Your Mattress Like A Pro For A Better Sleep Quality!

Cleaning a mattress is not only essential for improving sleep quality but also for enhancing general health and wellness. Considering the daily use of mattresses, which is more frequent than any other item in the house, it is crucial to address the accumulation of dead skin cells, sweat, dust mites, and other potential allergens.  These factors can lead to various allergic reactions and health problems, including sneezing, runny nose, chest congestion, itchy/red eyes, coughing, and even asthma symptoms. Fortunately, you can avoid these unpleasant experiences by following a step-by-step guide on mattress cleaning.  By incorporating regular maintenance into your cleaning routine, you can ensure a clean and hygienic sleeping environment. Let’s delve into the detailed instructions on how to clean a mattress. Related Article: How To Choose A Mattress? Undress the Bed To begin the process, the first step is to remove all the sheets and any other fabrics from the bed and proceed with washing them. It is recommended to hang the pillows outside where they can benefit from fresh air and sunlight.  Additionally, if desired, you may choose to use Febreze on the pillows. Furthermore, if your pillows require a thorough cleaning, it is advisable to refer to the instructions on the pillow’s tag to ensure proper washing methods are followed. Vacuum the Mattress If your vacuum cleaner is equipped with an upholstery attachment, now is an opportune moment to utilize it. Alternatively, utilize whichever attachment is most suitable for the task at hand.  Begin by systematically running the attachment along both the top and sides of the mattress, ensuring to overlap each stroke to ensure no areas are overlooked or missed during the cleaning process. Baking Soda to Remove smell To effectively eliminate odors from your mattress, follow these steps: By following these simple yet effective instructions, you can effectively tackle and eliminate even the most stubborn smells, ensuring a fresh and clean sleeping environment. Vacuum Again Once the 10 minutes have passed and the baking soda has effectively bonded with the sweat and oils from your skin on the mattress, it is now time to proceed with the removal of the baking soda. To achieve this, simply repeat the earlier vacuuming process. This will ensure the complete elimination of any residue and leave the mattress fresh and clean. Look For Some Stains After successfully removing all traces of baking soda, it is important to perform a thorough stain check. While the ideal time to address stains is immediately after they occur, it is still possible to effectively remove stains afterward. To tackle any stains you come across, create a gentle mixture by combining hydrogen peroxide and water. Utilize a white towel or rag to carefully dab the mixture onto the affected areas, avoiding direct pouring onto the mattress. Take a few minutes to work the hydrogen peroxide mixture into the fabric before using a dry rag to gently wipe off the treated area. Allow the treated spot to air dry naturally, and if necessary, repeat the entire process. Flip the mattress and Repeat When you have completed cleaning one side of the mattress, it is important to flip it over and repeat the entire process on the other side. Before you begin, ensure that the first side of the mattress is completely dry. Following these steps will help maintain the cleanliness and freshness of your mattress. Putting the Bed Back Together When you have finished cleaning your mattress, take a moment to consider which side you want to have facing upwards before reassembling everything. If your mattress has a pillow top, you typically only have one option in terms of orientation. However, you can still rotate the mattress so that the end that previously supported your head and upper body is now positioned at the foot of the bed. For mattresses without a pillow top, place the side that you have been sleeping on face down, and ensure that the end which was supporting your head and upper body is now at your feet. By following this step, you can increase the longevity of your mattress and maintain its comfort for a longer period of time. Final Words Now that you know the steps to clean your mattress, you should start applying it right now so that you will have a clean mattress. Hope I helped you!

How To Clean Your Mattress Like A Pro For A Better Sleep Quality! Read More »

How To Declutter Your Kitchen

How To Declutter Your Kitchen? 8 Easy Steps

If you are currently seeking guidance on how to effectively declutter your kitchen, then I have compiled 8 practical steps that will surely assist you in this endeavor. As we transition from spring to summer, it is not uncommon for our routines to be disrupted by the presence of kids and the numerous family outings that come with the season.  Consequently, our household chores may have taken a backseat, resulting in a cluttered kitchen populated by an assortment of items ranging from beach towels and toys to neglected dirty dishes. To restore order and reclaim the functionality of your kitchen space, it is crucial to undertake the process of decluttering and reorganizing.  Allow me to present a concise breakdown of the steps involved in this transformative process that will ultimately enhance your culinary experiences and overall kitchen ambience. How to Declutter a Kitchen in 8 Easy Steps Remove Everything that Doesn’t Belong in Your Kitchen In many households, the kitchen table and countertops often become a catch-all for various items that don’t belong there.  For instance, you may find magazines, electronic games left by your children, beach towels, or even shoes that were recently worn, cluttering up your kitchen space. To begin the decluttering process, it’s important to remove all these items that simply don’t belong in the kitchen. There are a couple of approaches you can take. One way is to use a basket and gather all the items to be put away later. Alternatively, you can put each item away as you pick it up to discourage your kids from leaving things around.  To further motivate your children, you can even introduce a playful element by charging them a small “ransom” to get their items back. This can be deducted from their allowance or assigned as an additional chore. Take the opportunity to put beach towels and other cloth items into the laundry, and promptly dispose of any trash you come across. By removing all the items that don’t belong in your kitchen, you will notice an immediate reduction in clutter and a more organized space overall. Tackle the Dishes Next In order to effectively declutter your kitchen, it is important to follow a systematic approach. Begin by first addressing the clean dishes that have been left in the dishwasher or strainer. Take the time to put them away, ensuring that they are no longer occupying any valuable space. Next, shift your attention towards the dirty dishes scattered throughout the sink and kitchen counter. Ensure that each individual dish is rinsed off before loading them into the dishwasher. This will allow the dishwasher to efficiently clean your dishes while you proceed with the other tasks involved in organizing your kitchen. Lastly, if you come across any dishes that are not suitable for the dishwasher, make it a point to hand wash them thoroughly. Once clean, proceed to store them away in their designated spot. Remember, by adhering to this structured process, you will achieve an organized and clutter-free kitchen space. Declutter Your Kitchen Counters and Other Surfaces To begin decluttering your countertops and achieve a neat and organized kitchen, take a moment to inspect the area for any items that don’t belong. This includes small appliances such as hand mixers or food processors that may have been left out on the cabinet.  Prioritize returning these appliances to their designated storage areas, while ensuring you wipe them down for cleanliness. Once you have completed this task, you will find that your countertops appear significantly tidier and less chaotic. At this stage, you can focus on conducting a minor general cleaning to restore your kitchen to a sparkling clean state. Declutter Your Kitchen Cabinets To maximize efficiency in your kitchen, it’s time to declutter and organize your cabinets. Start by getting rid of anything that is no longer needed or used, such as cracked or broken glasses, coffee mugs, and plastic containers without lids. This step will help create a more streamlined and functional space for your cooking and storage needs. Clean Up Surfaces To ensure a pristine kitchen, take a moment to gather your kitchen cleaner and thoroughly clean your countertops, stove, refrigerator, and other surfaces. Don’t forget to clean the sink, leaving it sparkling clean.  Additionally, consider wiping down your cabinet doors and the front of your cabinets to refresh the overall appearance of your kitchen. Declutter Your Kitchen by Getting Rid of Things You Don’t Need In order to declutter your space effectively, here are several items that you can throw away today without hesitation: By decluttering these items, you can create a more organized and efficient living environment without any regrets. Sweep and Mop Your Kitchen Floor To ensure a spotless and hygienic kitchen, follow these steps. Firstly, if you have any accent rugs on your kitchen floor, take them outside and give them a vigorous shaking to remove any dirt or debris.  Next, meticulously sweep the entire kitchen floor to eliminate any loose particles. Lastly, proceed to mop the floor thoroughly, leaving it shining and sparkling clean. By diligently following these instructions, you will be able to achieve a pristine kitchen environment. Taking Care of those Odds and Ends After restoring order to your kitchen, remember to put away the dishes as soon as the dishwasher completes its cycle. Additionally, make sure to replace your used dish towels on the towel rack with fresh and clean ones. Final Verdict So, these are the 8 different ways you can follow to declutter your kitchen properly. I did these 8 steps and my kitchen became cleaner and more clutter-free than before!

How To Declutter Your Kitchen? 8 Easy Steps Read More »

How To Steam Clean Bathroom Grout

How To Steam Clean Bathroom Grout?

If you’re looking to achieve a clean and fresh-smelling bathroom, learning how to steam clean bathroom grout is essential. Dirty grout can make your floors and tile walls appear dirty, regardless of how recently they were cleaned. Moreover, grout has the tendency to absorb odors such as urine in the bathroom, making it even more crucial to clean it regularly. Cleaning grout can be a labor-intensive task that can work your arm muscles. However, with the appropriate tools at hand, you can efficiently and quickly clean grout without the need for excessive scrubbing. The steam cleaner is the ideal tool to use for cleaning dingy tile grout. By incorporating steam cleaning into your bathroom cleaning routine, you can effortlessly achieve a well-maintained and pleasant-smelling bathroom. Can You Steam Clean Bathroom Grout? Steam cleaning bathroom tile grout can be a highly effective method for achieving cleaner and fresher-looking tile floors and walls. Unlike other cleaning methods that require considerable physical effort and time, steam cleaning offers a quick and efficient way to get the job done. Many individuals are pleasantly surprised by the results of steam cleaning their bathroom tile grout. Not only does it provide a deep and thorough clean, but it often reveals a different color of grout than previously anticipated. Incorporating steam cleaning into your regular cleaning routine can help maintain the best possible condition of your tile grout. With its ease of use and proven effectiveness, steam cleaning is a convenient choice for achieving optimal cleanliness in your bathroom. What Kind of Steamer is Best for Bathroom Grout? For the regular maintenance of your tile grout, it is highly recommended to invest in a steam mop. This investment will provide you with the convenience of effortlessly steaming your entire bathroom floor.  In the event that you do not have a steam mop, you can still achieve amazing results by utilizing a handheld steam cleaner.  Although it may require a bit more patience, using a small head attachment for your steam cleaner will enable you to focus the steaming power precisely on your tile grout lines. This targeted approach ensures thorough cleaning and upkeep. How to Steam Clean Tile Grout in Bathroom Floors To ensure optimal cleaning of your bathroom tile grout, it is recommended to follow a proper preparation process. Before using a steam mop, it is advisable to clean the floor separately for more effective results. By cleaning the floor first, you create a suitable environment for the steam mop to efficiently tackle the tile grout, resulting in a thorough and satisfactory cleaning experience. Sweep the Bathroom Floor To effectively clean bathroom grout lines, begin by using a stiff broom. Pay close attention to the grout lines and make sure they are free of any loose debris. Additionally, carefully inspect for any embedded dirt or other items that might be present.  If you come across any chunks of dirt or other materials, make sure to remove them diligently. Follow these steps meticulously to ensure a thorough and satisfactory cleaning of the bathroom grout lines. Mop the Floor For optimum hygiene, it is recommended to thoroughly clean your bathroom floor by quickly mopping it. This simple action effectively eliminates any excess dirt or grime, ensuring a clean and fresh environment. First Run To achieve optimal results, it is recommended to perform multiple passes with a steam cleaner when cleaning your bathroom tile grout. During the first pass, move the steam cleaner slowly along the lines of the grout, ensuring thorough coverage and effective cleaning. It is important to follow this methodical approach to ensure a well-done and satisfactory outcome. Wipe Up Dirt with a Clean Towel It is recommended to carefully follow behind with a clean towel immediately after removing any dirt to prevent it from drying back onto the surface. This subsequent wiping can help maintain the cleanliness and prevent the grout from appearing blotchy or uneven. Please note that this occurrence is completely normal, as dirt may not adhere evenly to the grout in your home. Treat with Peroxide After completing the initial pass, it is advisable to apply peroxide to the areas where dirt remains or where steaming was ineffective. Allow it to sit for approximately 5 minutes before reinitiating the steaming process. This additional step will help ensure a thorough cleaning of the targeted areas. Second Run To effectively clean the grout lines, it is recommended to follow along while pausing intermittently. This allows the steam to work its magic in areas that require treatment, effectively eliminating dirt and grime. Allowing the steam to seep into the dirt is a highly effective method for breaking up even the most stubborn, set-in stains. Repeat Peroxide Treatment if Needed To continue, perform the cleaning process once more using a fresh cloth. If necessary, repeat the peroxide treatment and steam treatment. This comprehensive approach ensures thorough cleaning and optimal results. How to Steam Clean Tile Grout in Shower Walls Clean the Walls Before you start, it is important to clean the shower wall thoroughly. Soap scum tends to accumulate and can trap dust and dirt in the shower grout, ultimately causing it to appear dull and unclean. Taking the time to clean the shower wall will ensure a pristine and impeccable look. Steam Clean the Walls To effectively clean the shower tile grout, follow these steps. Begin by ensuring that your shower walls are clean. Once done, start steaming the grout from the top, moving downward along the grout lines.  This technique allows the melted soap scum and grime to flow down the shower walls and be rinsed away as you progress downward. By incorporating this method into your cleaning routine, you can achieve a thoroughly cleansed and revitalized shower space. Rinse Well To effectively prevent grime from drying back onto your tiles, it is recommended that you rinse your shower walls thoroughly and frequently as you work your way across them. By doing so, you can maintain the cleanliness and pristine condition of your

How To Steam Clean Bathroom Grout? Read More »

How To Steam Clean Area Rugs

How To Steam Clean Area Rugs?

Area rugs not only add a decorative touch to homes, but they also provide warmth in winter and offer safety on slippery floors. However, like wall-to-wall carpeting, area rugs can accumulate dirt, stains, unpleasant odors, and dust.  To restore their appearance and freshness, steam cleaning is an effective solution. With this easy-to-follow step-by-step steam cleaning guide, you can learn how to steam clean area rugs. By removing dirt, stains, and odors, your area rugs will look and smell good again.  Additionally, steam cleaning them will help maintain their cleanliness and prolong their lifespan. Start enjoying clean and fresh area rugs today! Can You Steam Clean Area Rugs? Yes, steam cleaning is an effective method for cleaning area rugs. It not only eliminates unpleasant odors caused by old food, stinky feet, and pets but also restores their appearance and freshness. Furthermore, steam cleaning is a gentle and efficient alternative to other cleaning methods. Unlike carpet cleaners that saturate the rug, steam cleaning is less likely to cause damage and ensures faster drying times.  By incorporating steam cleaning into your routine, you can maintain the cleanliness and longevity of your area rugs effortlessly. How To Steam Clean Area Rugs Inside Your Home? Vacuum Properly preparing your area rug before steam cleaning is crucial for effective results. Start by thoroughly vacuuming your rug to eliminate loose dirt. Additionally, for heavily soiled rugs, consider flipping them over and gently beating the bottom of the rug with a broom to dislodge any deep-seated dirt and dust trapped within the fibers.  Afterward, perform another round of vacuuming to remove any dust that may have settled on the floor beneath the rug. This comprehensive approach ensures a thorough and successful steam cleaning process. Spot Treat Stains To effectively address stains on your rugs, it is recommended to use a high-quality spot treatment. By applying spot treatment promptly, you can facilitate easier stain removal during the cleaning process. It is advisable to avoid delaying the cleaning and promptly spot clean your rugs whenever they become dirty, rather than postponing the task. When you are ready to steam clean your rugs, make sure to thoroughly inspect them for any overlooked spots or blemishes. Taking the time to perform a detailed inspection will help ensure that your rugs receive a thorough cleaning. Start Steam Cleaning To effectively steam clean your area rugs, begin by prepping them accordingly. Starting from one end, gradually work your way to the other end while ensuring that each run overlaps. This technique is essential to avoid leaving any visible lines on the rug once the cleaning process is complete. Use the Extraction Setting To optimize the drying process of your area rug post steam cleaning, it is advisable to incorporate an additional step. Once you have completed the steam cleaning, run the steam cleaner on the extraction only setting to eliminate any residual water trapped within the rug fibers.  This meticulous procedure helps to extract as much liquid as possible, thereby expediting the drying time of your area rug even further. By following these steps diligently, you can ensure a thorough and efficient drying process for your precious area rug. Repeat Stain Treatment if Needed For persistent stains that are resistant to removal, it is recommended to repeat the pre-treatment process and thoroughly scrub those areas before proceeding with the steaming process again. This additional step will help ensure effective stain removal and restore the desired cleanliness. Steaming Cleaning Area Rugs Yourself Outside Hang Rug on a Railing or Laundry Line One alternative method for effectively steam cleaning your area rugs is by taking them outdoors. To do this, carefully position the rug over a sturdy and elevated surface, such as a railing, laundry line, or fence.  Elevating the rug off the ground helps facilitate efficient cleaning and drying. This approach ensures thorough maintenance of your area rugs in an efficient and convenient manner. Give the Rug a Beating to Remove Dust One effective way to remove excess dirt and dust from your area rug is by utilizing the handle of a broom to give it an old-fashioned beating. This method is especially beneficial if you prefer to take the dust outdoors or if you don’t have access to a vacuum cleaner for extracting the dirt and dust particles.  By vigorously beating the rug with the broom handle, you can dislodge and remove accumulated debris more effectively, leaving your rug cleaner and fresher. Pre Treat Stains For a more comprehensive cleaning approach, consider taking the following steps with your area rug when it comes to treating visible stains exposed by natural sunlight. This method can prove to be especially beneficial if you have limited interior lighting conditions. Steam Clean the Rug To effectively clean your rug without causing any damage, it is recommended to use an upholstery steam cleaner. Begin by starting from the crease and clean the rug in a horizontal pattern. Ensure that you overlap each pass to prevent any lines from being left behind on your freshly cleaned rug. Retreat Stains if Needed When exposed to sunlight, you may notice persistent stains that cannot be removed naturally. As a solution, it is recommended to treat these stains and then use a steam cleaner to effectively eliminate them. This process ensures thorough cleaning and restoration. What Type of Steam Cleaner can You Use on Area Rugs? When it comes to cleaning area rugs, the most suitable option is an upholstery steam cleaner. This specific type of steam cleaner features a tank designed to efficiently extract the liquid and dirt trapped in the fibers. Using other types of steam cleaners may fail to remove the liquid and dirt, resulting in an unclean and unpleasant-looking area rug that retains odors. For larger or thicker area rugs, utilizing a full-size carpet steamer yields the most effective clean.  This option proves particularly beneficial for individuals with multiple rugs, as it offers faster and more efficient cleaning compared to an upholstery steamer. It is crucial to avoid

How To Steam Clean Area Rugs? Read More »

How To Clean A Dirty Stove Top

How To Clean A Dirty Stove Top?

To maintain the cleanliness and appearance of your cooktop, it is important to learn effective cleaning techniques. The thorough removal of food particles and grease splatters is necessary, especially if you use your stovetop frequently.  Failing to clean your cooktop after each meal can lead to unsightly residue from burned food particles and grease, which can make your kitchen appear messy and untidy. By following these simple and easy cleaning tips, you can keep your cooktop clean and sparkling like new. The method for cleaning your stove top will vary slightly depending on the type you have, such as glass/ceramic, stainless steel, or other metal. To help you maintain a clean and sparkling stovetop, here are some additional tips and tricks that you can follow. Cleaning Your Glass Stove Top Glass stovetops are a popular choice in modern kitchens due to their sleek appearance. However, it is important to note that even the smallest splatters can be easily noticeable on these surfaces. To ensure proper maintenance and cleanliness, follow these steps for cleaning your glass cooktop: By following these steps, you can effectively maintain the cleanliness and appearance of your glass stovetop. How to Clean a Stainless Steel Cook Top Stainless steel cooktops are highly desirable due to their attractive appearance and durability. However, over time, burnt-on food particles and grease can diminish the aesthetic appeal of your stovetop. To ensure optimal cleanliness, follow these simple steps for cleaning your stainless steel stove top: By following these steps, you can keep your stainless steel stove top looking pristine while maintaining its longevity and functionality. Remember to always wipe the surface following the grain of the stainless steel to achieve the best results. How to Clean Other Metal Stovetops Stovetops can be made from various types of metal, not just stainless steel. If you have a stovetop made from a different metal, follow these tips to ensure proper cleaning and maintenance: By following these steps, you can effectively clean and maintain a stovetop made from a variety of metals. Suggested Cleaning Products for Stovetops Below, I have listed some highly effective cleaning products that you can utilize to efficiently clean and maintain the cleanliness of your stovetops. These products have been carefully selected for their exceptional cleaning properties and are highly recommended for tackling even the toughest stains and grime. The Weiman Glass Cook Top Cleaning Kit is a comprehensive three-piece set designed for effective cooktop maintenance. It includes the specially formulated cleaner, a high-quality scrub pad, and a convenient handle for easy usage. With this kit, you can effortlessly achieve a spotless and sparkling cooktop surface. The Cerama Bryte Cleaning Kit consists of a highly effective Cerama Bryte cooktop cleaner, a convenient scraper for removing tough stains, and a durable cleaning pad. This comprehensive kit offers everything you need to effortlessly clean and maintain your cooktop’s pristine condition. The Bar Keeper’s Friend Stove Top Cleaning Kit is a comprehensive solution for maintaining the cleanliness and appearance of your stove top. This kit includes the highly effective Bar Keeper’s Friend cleaner, a durable scrubber for removing stubborn stains, and a cook top scraper specifically designed for gentle yet thorough cleaning. With this all-in-one kit, you can easily and efficiently keep your stove top in pristine condition, ensuring optimal performance and prolonging its lifespan. Wrapping Up A dirty stove can have a negative impact on the overall appearance of your kitchen. Conversely, ensuring that your stovetop is clean, tidy, and inviting can significantly contribute to the overall cleanliness and appeal of your kitchen space. By maintaining a regular cleaning routine for your stove, you can create a welcoming environment that is both aesthetically pleasing and hygienic for your culinary endeavors.

How To Clean A Dirty Stove Top? Read More »

How To Declutter Your Garage

How To Declutter Your Garage The Right Way!

Decluttering your garage is a significant undertaking that yields substantial benefits. Not only does it create a safer environment, but it also provides ample space to park your car. Our comprehensive guide will walk you through the process step by step, ensuring a successful and stress-free decluttering experience.  Whether you’re dealing with old furniture, rarely used items, or simply an overwhelming amount of stuff, our expert tips and strategies will make this project more manageable.  With a bit of effort and our helpful advice, you’ll transform your cluttered garage into an organized and functional space in no time. Say goodbye to the chaos and hello to a clean and inviting garage! Helpful Tips For Decluttering Your Garage Before you begin your garage decluttering project, I would like to offer you some valuable tips and advice that may assist you in achieving successful results. Involve Your Whole Family To successfully tackle the monumental task of decluttering your garage, it is advisable to form a dedicated team. This particular job can be quite extensive and time-consuming, often requiring several days to complete. By involving the entire family in this project, you can significantly expedite the process and achieve efficient results. As You Declutter, Avoid Deep Cleaning When decluttering your garage, it is advisable to avoid attempting deep cleaning at the same time. Unlike indoor rooms, garages can often become significantly messy. It is recommended to resist the temptation of getting absorbed in cleaning one mess after another while decluttering.  Instead, take note of any areas that require cleaning and postpone the task until after you have finished decluttering. This approach allows for a more efficient and focused decluttering process. Never Throw Away Your Spouse’s Stuff Without Permission It is advisable to refrain from discarding your spouse’s belongings without obtaining their permission. If you are unsure about certain items, you can place them in a designated section of the floor or a box for your spouse to review.  While decluttering your garage may be your objective, it is essential to prioritize preserving the harmony and avoiding unnecessary strain in your relationship. Think About a Storage Unit To streamline the process of cleaning and organizing after a major declutter, it is recommended to consider utilizing a storage unit for items that you wish to retain. This approach facilitates the overall organization of your space once you have successfully eliminated any unnecessary belongings.  By opting for a storage unit, you can conveniently store possessions that are not immediately required, allowing you to focus your efforts on tidying up and maximizing the efficiency of your living or working area. 10 Easy Steps To Declutter Your Garage Properly Make a plan first When tackling a substantial project like cleaning and organizing your garage, it is crucial to approach it with a well-thought-out plan. First and foremost, choose a day or two with promising weather conditions that will allow you to effectively empty out the garage, thoroughly sweep the area, and wash any surfaces that require it before proceeding with the organization phase. Make sure to mark the designated day on your calendar and consider involving your family or even enlisting the help of friends, if possible. Additionally, if necessary, arrange for a dumpster to properly dispose of any unwanted items.  It is also advisable to acquire the appropriate organizational tools in advance, ensuring you have everything you need at your disposal. Lastly, when embarking on this mission, it is advisable to dress comfortably and wear suitable footwear to optimize your work experience. Set Up Boxes or Containers To efficiently organize your garage, start by setting up designated boxes or containers for items that you intend to dispose of, donate, sell, or recycle. As you clear out the garage, ensure that you place each item in its appropriate box or pile to prevent reintroducing them back into the space. For the items you wish to keep, it is advisable to sort them into specific categories, such as sports equipment, yard tools, repair tools, and more. This categorization will simplify the organization process and help you maintain a tidy and functional garage. Do First Round Pick Up Have everyone grab a trash bag and do a run-through looking for things that need to be thrown away. This is a great way to get the first round decluttered and give you more space to work by getting rid of what is out in the open before you start digging. Sort through Boxes To maintain an organized and clutter-free garage, start by sorting through boxes and removing any unnecessary items. While the garage is a convenient storage space, it’s important not to let it become overcrowded. To ensure easy identification of your belongings, label the boxes containing items you wish to keep. This will make it convenient for you to locate specific items at any given time. Additionally, consider utilizing shelves to stack these labeled boxes, as it helps in maintaining a more organized storage system. Sort through the Toolbox When you spend substantial time working in your garage, it’s highly likely that you own a toolbox or even multiple ones. However, it’s common for these toolboxes to become disorganized, making it exceedingly challenging to locate the necessary tools. To rectify this, you can follow a systematic approach. First, thoroughly inspect your toolboxes and identify any tools that require repair or replacement. Take this opportunity to remove any unwanted trash that may have accumulated while working in a rush. Furthermore, consider shifting old nuts and bolts to separate jars, allowing for easier accessibility when needed. By implementing these steps, you can effectively organize and optimize your toolboxes, ensuring a more efficient and streamlined garage workspace. Check that Old Gallon of Paint When storing paint or chemicals in your garage, it is important to check for expiration dates and inspect the packaging for any damage. Using expired or damaged products can be ineffective when you need to repaint your living room.  To keep track of the colors, you can take a

How To Declutter Your Garage The Right Way! Read More »

Scroll to Top