https://pagead2.googlesyndication.com/pagead/js/adsbygoogle.js?client=ca-pub-9463394879326171 crossorigin="anonymous">

Author name: Louis Dioso

How To Remove Sharpie from Walls?

How To Remove Sharpie from Walls?

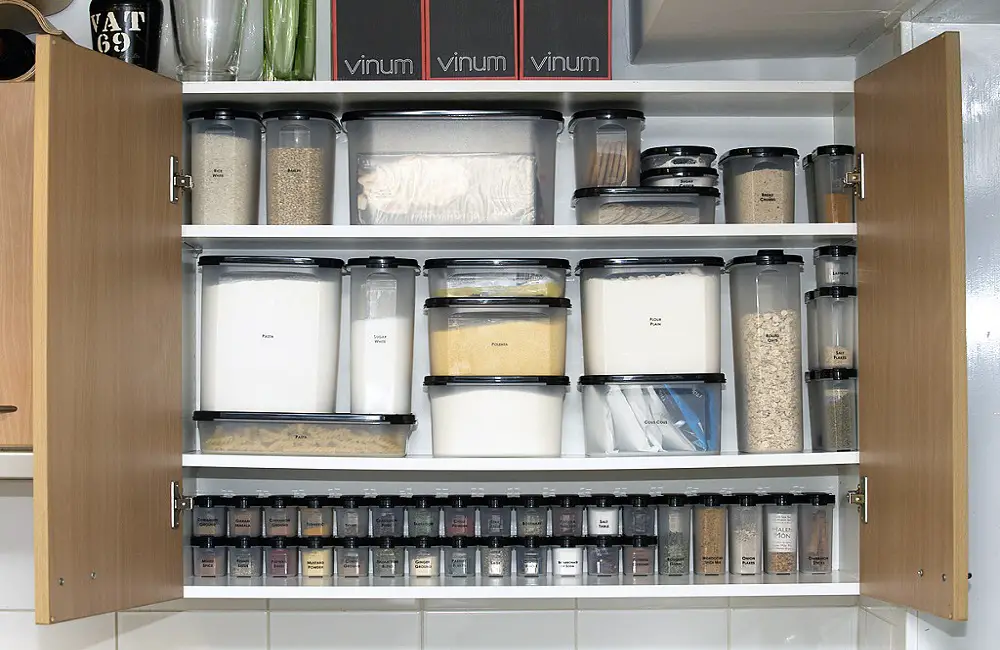
Are you tired of dealing with unsightly Sharpie marks on your walls? If so, you’ve come to the right place. In this guide, we will provide you with simple and effective tips on how to remove Sharpie from walls. When it comes to removing Sharpie ink from walls, you may think it’s an impossible task. However, fear not! We have tested various methods that are safe to use on painted surfaces and have proven to be successful in removing stubborn Sharpie marks. One method you can try is using sunscreen. Surprisingly, it can work wonders in removing Sharpie from walls. Additionally, other safe methods include using dry-erase markers, WD-40, white toothpaste, baking soda, or Mr. Clean Magic Erasers. It’s important to assess the potential damage to the paintwork before using stronger solvents like acetone or rubbing alcohol. Discovering a large Sharpie mark on your freshly painted wall can be quite distressing. Even small marks, like Mona Lisa’s eyes, can catch your attention no matter where you are in the room. However, there’s no need to panic or resort to extreme measures like repainting the entire house or hiding the mark behind a giant houseplant. We’re here to help! We have compiled a comprehensive Sharpie removal toolkit that includes detailed instructions on each method mentioned above. With this toolkit, you’ll be equipped to tackle those stubborn Sharpie marks with ease and restore your walls to their original beauty. So, say goodbye to Sharpie marks and regain the pristine look of your walls. Let’s get started on removing those unwanted ink stains! 6 Easy Tips To Removing Sharpie From Walls Sharpie pens are often touted as permanent, but experienced cleaners understand that nothing lasts forever, except, perhaps, diamonds. When it comes to removing ink marks from walls, the key is to find effective methods that spare the paintwork. Before we delve into our fail-proof techniques for eradicating permanent marker stains from walls, it’s important to bear in mind that Sharpie ink behaves more like spray paint than regular pen ink. As such, it requires a slightly different approach for successful removal. The ability of Sharpie ink to adhere to surfaces hinges on the evaporation of volatile organic compounds (VOCs). In theory, the quicker you respond to a Sharpie mark, the easier it will be to eliminate. While the idea of promptly wiping away marks from your walls may seem appealing, it’s highly unlikely that anyone would calmly witness the creation of wall art masterpieces, especially when they involve permanent markers. By the time you notice the addition of color and texture to your plain walls, chances are the ink has already firmly set. Remember that cleaning glossy painted surfaces is generally easier than dealing with matte finishes, but with some persistence, Sharpie can be successfully removed from both. Whether a permanent pen mark has been on your wall for a mere two minutes or a lengthy two years, fear not, as we have solutions to remedy the situation. Of course, while addressing one problem, it’s essential to avoid creating another. Therefore, let’s explore a list of household products that effectively remove Sharpie ink from walls without causing any damage to the paint. Sunscreen Using ordinary sunscreen is an unusual but highly effective solution that can successfully remove Sharpie ink from walls. This method is an excellent starting point when faced with this challenge because it is ultra gentle on the wall paint. To apply this method, you need to spray a generous amount of sunscreen directly onto the affected area of the wall, and then gently wipe it off using clean paper towels. Depending on the severity of the pen marks, you may need to repeat this process several times until the marks are completely eliminated. Here’s a top tip: To prevent the sunscreen runoff from making a mess, you can hold a clean paper towel underneath the targeted area while spraying. This method is also suitable for gently removing Sharpie ink from skin. By following these steps using everyday sunscreen, you can effectively remove Sharpie ink without damaging the wall paint or causing any unnecessary inconvenience. Dry Erase Markers Dry erase markers are an effective choice for creating minimalistic line-style wall artworks. However, it’s important to note that using these markers is not suitable for all types of artwork. Before you begin, make sure you are using dry erase markers and not mistakenly applying permanent ink like Sharpie to your wall.  This is a common mistake due to the similar appearance of the pens. To remove the Sharpie mark, carefully trace over it with the same color dry erase marker and then wipe off both marks using a dry cloth.  It may be necessary to repeat this process multiple times to fully remove the mark. By following these steps, you can ensure the proper use of dry erase markers and maintain the integrity of your wall art. The WD-40 Trick To effectively remove permanent pen ink from walls or accidental whiteboard markings, WD-40 can be an excellent solution. Begin by generously spraying a sufficient amount of WD-40 onto the affected area, ensuring to place a clean paper towel underneath to catch any drips. Allow the WD-40 to sit for a few seconds before proceeding.  Next, using a dry cloth, apply firm circular motions to scrub the wall in order to effectively dissolve the ink. It is important to note that, due to the lubricating properties of WD-40, a greasy patch may be left behind. Therefore, it is recommended to wash the wall with soap and water once the Sharpie mark has been successfully removed. Mr. Clean During the remarkable year of 2003, Mr. Clean Magic Erasers ignited an unprecedented cleaning revolution. Once, the arduous task of eliminating stubborn grime required hours of laborious effort, but with these modern melamine foam sponges, a mere few wipes will suffice. Consider enriching your household toolkit with the iconic Mr. Clean Magic Erasers, designed to be effective yet gentle on various surfaces. And in

How To Remove Sharpie from Walls? Read More »

How To Choose A Rug Color For A Bedroom

How To Choose A Rug Color For A Bedroom?

When you consider refreshing your home for different seasons, starting with the bedrooms is a great idea. Focusing on your family’s quality of rest and wellness will create a serene and comfortable atmosphere. For my own bedroom, I found inspiration in a softly faded silk rug that a friend bought for me during a trip to India several years ago. The combination of blues and greens creates a tranquil oasis that I love coming home to. If you’re someone who enjoys following design trends or embraces your own unique style when decorating, it can be helpful to know what interior designers are currently doing. In this case, let’s explore some tips on choosing the best rug colors specifically for bedrooms. For a serene and practical feel, consider incorporating serene neutrals such as cream, beige, gray, and blush pink. If you prefer a brighter yet still tranquil vibe, shades of blue and green can be an excellent choice. If you’re looking to add warmth and color, earthy reds and oranges can do the trick. However, if you’re decorating a kids’ room, consider using bright yellow, red, and orange. You may also consider using a patterned rug as either a cohesive element or as a statement piece. Remember that a bedroom is a place for relaxation, rest, and restoration, serving as your personal refuge from the chaos of the outside world. Therefore, the colors you choose for your bedroom should evoke feelings of peace and tranquility. As you add color to your bedroom, whether through paint, soft furnishings, or curtains, don’t forget to pay attention to the floor. The right rug can tie the entire room together, completing your desired aesthetic and adding that extra touch of comfort. 7 Tips For Choosing The Best Bedroom Rug Color When it comes to selecting a color palette for a room, there is no fixed starting point. You have the freedom to draw inspiration from various elements, such as a luxurious curtain fabric, an intricately patterned rug, or a stunning new dining table. However, it is considered a prudent designer’s approach to begin with the most expensive decor item, as it is less likely to be replaced frequently. In the case of the living room, the sofa typically takes on this role. Contrary to common belief, the bed doesn’t necessarily have to be the focal point of a bedroom’s color scheme since bedding can be easily changed without incurring significant expenses. Instead, you can opt for a lavish rug that not only adds a touch of opulence but also provides a cozy and comfortable feel underfoot. While curtains play an important role in darkening a bedroom, it’s worth considering the sensory pleasure that a plush rug can offer. Not only does it minimize the sound of footsteps, but it also keeps your toes warm. Investing in such daily comfort is certainly worthwhile. Additionally, a rug can act as a “fifth wall,” serving as an inspiration or anchor for a room’s design. Consider the following suggestions to assist you in selecting the perfect rug for your bedroom: The Ambience (Mood) You Want to Create When considering the ambiance you wish to create in your bedroom, it’s important to determine the desired mood. Identifying the specific atmosphere will facilitate the selection of an appropriate rug color. Do you envision a serene and calming spa-like retreat characterized by soothing blues and grays? Or perhaps you prefer a more feminine touch with floral patterns? Neutrals, being a timeless choice, are always in style. They promote a visually pleasing environment and evoke a sense of tranquility. To further guide your decision-making process, it might be helpful to create a mood board showcasing the room’s finishes, colors, textures, and fabrics. This will ensure that your chosen rug complements the overall aesthetic of the space. The Size of Your Bedroom Neutral shades are an excellent choice for larger area rugs or expansive rugs. This is because a massive, brightly colored rug spread across the bedroom can be overpowering. However, if you want to add color to your space, neutral area rugs can provide an anchor. You can also layer the look by adding smaller accent rugs for a more visually appealing and dynamic design. Create Cohesion When considering the colors of the wall and floor, it is important to think about how they will complement the existing furnishings in the room. For example, if the room is already filled with vibrant colors, it would be wise to opt for a neutral rug. Neutral rugs have the advantage of seamlessly blending with any furniture placed on them, creating a timeless look that doesn’t require updating with changing fashion trends. The versatility of neutrals makes them highly suitable for bedrooms. Even if you decide to change the colors of your bedding, add new lamps and artwork, or even paint the bedroom walls, the neutral rug will still effortlessly coordinate with the new elements. It is worth considering investing in a truly luxurious rug if you choose to keep it neutral. Instead of choosing stark white, you might want to explore earthy beige, taupe, or tan options, as they are subtle and perfectly suited for Scandi and eco-chic bedroom styles. A patterned rug can also serve as a cohesive element in your bedroom, tying together various elements such as bedding, curtains, and soft furnishings. Opting for a timeless striped design can be a great decision if you’re unsure about incorporating a patterned rug. Favorite Color When selecting a rug color, it is crucial to consider your personal preference. Take into account your favorite colors and explore various options that align with your taste. For instance, if you have a fondness for the color purple, you can opt for an accent rug. This will bring delight to your space, saving you the time and effort of repainting the entire room. Make a Statement A statement rug can serve as a beautiful and inspiring focal point for your bedroom redesign. Just like the ceiling, the floor

How To Choose A Rug Color For A Bedroom? Read More »

Small Kitchen Organization Ideas

7 Small Kitchen Organization Ideas

Despite limitations in size and resources, small kitchens can still possess functionality and style. The absence of expansive islands, multiple stoves, large refrigerators, or double sinks should not discourage you.  Moreover, there are various tips and tricks available to optimize small kitchen spaces, such as utilizing vertical space and tapping into your creativity to generate unique decor ideas.  By employing these strategies, you can enhance the overall aesthetics of your kitchen while accommodating limited space. 1. Drawers and Slots When it comes to storage, whether it’s in the kitchen or any other room of the house, the size of your space can often pose a challenge. However, there are a few effective strategies that can help you tackle this issue and optimize your storage capacity. One practical solution is to maximize the use of wall space, counters, and corners. By adding slots on the walls for cutting boards, kitchen towels, and cutlery, you can free up space on countertops and in drawers.  This not only creates more room for other appliances but also allows you to organize your kitchen in a sophisticated manner. In terms of slot options, you have a wide range to choose from. Wooden slots work great for easy storage, while wall slots are particularly useful in a kitchen where there are counters, dishwashers, refrigerators, and other large appliances to consider.  Utilizing smaller drawers instead of large ones not only provides more space but also contributes to a neat and organized appearance. You can even create partitions in your drawers using plastic cards or pieces of wood, or add removable shelves for additional space.  Large drawers often waste vertical space and can become disorganized due to their size. By incorporating these strategies, you can optimize storage space and achieve a more organized and efficient living environment. 2. The Built-In Concept One effective method of utilizing wall space and maximizing storage is by installing shelves and slots. These built-in storage solutions not only optimize space but also contribute to an organized and visually appealing kitchen design. Built-in Shelves  One way to maximize kitchen space is by installing built-in shelves on the wall above the counters. These shelves are ideal for storing smaller appliances such as a blender, coffee maker, cake mixer, and chopper.  Additionally, they can also be utilized for displaying kitchenware or hanging wine glasses, adding a touch of luxury to your kitchen. To enhance the aesthetics of the wall, consider coordinating the color of the shelves with the items placed on them. Built-in Appliances Including built-in appliances such as a water dispenser, gas or microwave oven, coffee maker, and dishwasher can greatly enhance the functionality and aesthetics of your kitchen. Not only do these appliances save space, but they also provide added convenience. Additionally, stacking the washing machine and dryer in the kitchen can further maximize efficiency and organization. 3. Standing Racks or Hanging Racks? Racks are an excellent solution for efficiently organizing and maximizing space utilization in various settings, including kitchens. Not only do they provide convenient access and transparency, but they also offer a visually appealing display for showcasing and organizing items.  By utilizing racks, you can optimize your storage capacity and enhance the overall functionality and aesthetics of your setting. Steel Racks To optimize kitchen organization and expedite dish drying, consider installing a stainless steel rack on the wall or kitchen counter near the sink. These versatile racks facilitate convenient stacking of washed plates, kitchenware, mugs, and glasses. By providing ample space for storage and efficient drying, these racks serve as practical additions to any kitchen setup. Wooden Racks Wooden racks are a practical choice for displaying collections, decorative items, or wine bottles. However, they are not suitable for dishes due to the risk of water damage. If you are interested in DIY projects, you can find numerous ideas online for creating your own wooden rack.  Alternatively, if you prefer a convenient solution, you can purchase one from a reputable online retailer. When making your purchase, ensure that you choose a reliable company that provides intact packaging to protect your wooden piece during shipping.  Additionally, it is important to select a rack with a clean finish, free from any nails or glue drippings. Where to Place the Rack in Your kitchen? When it comes to organizing and displaying items, there are a few options to consider. First, placing a rack in a corner can help maximize space utilization. Additionally, small racks placed on countertops can be a great solution.  Another option is using lightweight racks that can be easily installed on a wall, which works particularly well for stocking wine or displaying antiques. If you’re looking for a unique display idea, you can use chains to hang bowl-shaped racks from the ceiling.  However, do keep in mind that this method is only suitable for lightweight goods or for showcasing a beautiful succulent plant. 4. Takedown a Wall In order to enhance the overall aesthetic and functionality of the space, consider the possibility of removing the wall that separates the kitchen and living room. This bold decision can create an illusion of a significantly larger kitchen and dining area, offering a more expansive and open feel to the entire space. By merging the kitchen and dining room, not only will you visually enlarge the setting, but you will also gain the added benefit of easy access to the dining table. This seamless integration allows for delightful conversations with family and friends while preparing meals.  Moreover, if you find that your kitchen is overcrowded with plates and costly chinaware, the option of incorporating a closet in the dining room can provide a convenient solution for neatly storing these items. Expanding the storage capacity in this manner not only optimizes your kitchen’s functionality but also enhances the overall organization and aesthetics. Kitchen Bar By removing the previously existing wall, you can reclaim the space and create a stylish mini bar within your kitchen. This will provide an ideal spot for your friends to relax, enjoy

7 Small Kitchen Organization Ideas Read More »

Habits Of People With Really Clean Homes

9 Habits Of People With Really Clean Homes

When you go to visit a neighbor and are pleasantly surprised by how spotless and well-organized their home is, it might leave you feeling slightly discouraged in comparison to your own living space.  This common reaction can be attributed to the comparison trap. However, it’s important to remember that achieving a tidy home is within your reach.  By implementing a few lifestyle changes and adopting new cleaning habits, you can create an environment that is equally pristine.  Allow me to share some of the most effective strategies to help you achieve and maintain an immaculate home. 1. Always Keep Those Floors Clean & Clear Many individuals fail to establish a routine of maintaining a clutter-free floor in their homes, resulting in neglected carpets and haphazardly placed toys, pillows, and shoes. This negligence has a direct impact on the overall organization and tidiness of one’s living space. To address this issue, it is advisable to acquire a designated basket for toys and consistently store coats and shoes in the closet. Furthermore, it is essential to extend cleaning efforts by vacuuming beneath tables and in less noticeable corners of the room. This thorough approach ensures a visually appealing and well-maintained environment. 2. Clean As You Cook One way to prevent kitchen disasters is by promptly organizing items while the stew simmers on the stove. Adopting a minimalist approach in the kitchen, with fewer dishes to manage, can expedite and simplify the process.  Not only does this practice save time, but it also boosts your sense of achievement. Furthermore, enjoying dinner becomes more delightful when you don’t anticipate the daunting cleanup that lies ahead. 3. Organize Seasonally To Save Your Sanity And Money When the winter season comes to an end, it is advisable to store your winter clothes and decorations to free up space in your closet or laundry room. You can invest in storage containers to safely store these seasonal items, such as heavy throw blankets and mittens.  Optimal places for storage include the garage or basement. By doing this, you not only create more space but also save money by avoiding the need to repurchase these items next year. 4. Assign Laundry Day And Be Strict About It It is crucial to establish a designated day for laundry to maintain an organized routine. Avoid the temptation to postpone laundry, as this may lead to further delays and excuses. Even though it may appear insignificant to skip one laundry day, this can pave the way for procrastination. By adhering to a strict laundry day, you can prevent the accumulation of a daunting laundry pile. It is essential to ensure that all clothing items are thoroughly cleaned and neatly put away by the end of the designated day to uphold tidiness and orderliness. 5. Clean The Fridge For Your Health It is important not to overlook the cleaning of your refrigerator, as this is a reflection of your character through the way you store your food. Rather than allowing leftover take-out to spoil on the back shelf, it is recommended to empty the fridge and replace it with food that you are confident you will consume. Be sure to thoroughly scrub away any stains and discard any old vegetables. Remember that cultivating this habit not only contributes to your health, but also promotes a hygienic and organized living space. 6. Don’t Fear Empty Spaces It is not uncommon for many individuals to have a propensity for purchasing delightful trinkets from thrift establishments. However, it is crucial to acknowledge that there can be a limit when it comes to collecting such items. This principle also applies to accessories like jewelry and secondhand clothing. If you happen to have wall shelves, it is advisable not to overcrowd them with thrifted discoveries. Instead, preserve those spaces for significant photographs or consider removing the shelves entirely. It is worth noting that there is absolutely nothing amiss with having a bare wall as it conveys a sense of cleanliness. 7. Don’t Keep Old Paper It is recommended to discard outdated bills instead of retaining them for future reference. Similarly, if you do not utilize coupons, it is unnecessary to keep them in your drawer. The accumulation of paper tends to happen swiftly and will often slip your mind as soon as it is stowed away. Developing a habit of disposing of unnecessary mail and forms rather than keeping them “just in case” is crucial for maintaining an organized space. 8. Learn To Fold Clothes In Unique Ways One common challenge faced by individuals is the inability to effectively fold their clothes, resulting in inefficient use of storage space. However, there are specific techniques that can be employed to address this issue and optimize space utilization.  By implementing proper folding methods, you can significantly improve the organization of your drawers and prevent clothes from being haphazardly strewn across the floor. This not only enhances accessibility but also promotes a neat and tidy appearance within your living space. 9. Make The Bed In The morning Believe it or not, making your bed is a great way to start your day. It creates a sense of productivity and makes the room feel complete. Not only is this an easy habit to maintain, but it can also kick-start your day in a positive direction. Final Thoughts Organized individuals employ a variety of effective habits to maintain a consistently clean and tidy home. By adopting and implementing these practices, you too can ensure that your house remains neat and well-organized. Embracing these strategies will undoubtedly make a positive difference, leaving you satisfied with the overall appearance and cleanliness of your living space.

9 Habits Of People With Really Clean Homes Read More »

How To Decorate An Outdated Apartment

7 Tips On How To Decorate An Outdated Apartment

Do you find yourself stuck in an outdated apartment? Do you feel like you’re living in the past every time you walk through your door? Fret no more!  With just a few simple steps, you can breathe new life into your outdated apartment and give it the modern look that you crave.  Follow these 7 tips on how to decorate an outdated apartment and transform your living space into something you love. 1. Paint Painting is undoubtedly the easiest and most cost-effective way to give your apartment a fresh new look. Choose light, neutral colors in cool tones like gray, blue or green to counterbalance the outdated style, or opt for bold colors to add pops of excitement to your space. Just make sure to get your landlord’s permission before you start! 2. Lighting Replace old, outdated light fixtures with trendy, modern ones. Lighting plays a prominent role in setting the mood of a room, so choose fixtures that provide both ambient and task lighting to make your space look and feel modern. 3. Mirrors Mirrors are an excellent way to add both light and space in a small or outdated apartment. Mirrors can help make a room feel more spacious and brighter, so choose an oversized mirror or hang multiple mirrors in different sizes and shapes on one wall to create a unique focal point. 4. Curtains Ditch dated blinds and curtains and replace them with modern ones. Choose curtains that are light and airy for a more effortless look. For a bold statement look, opt for patterned curtains that add a fun and fresh twist to your décor. 5. Textures Experiment with textures, mixing materials such as wood, metal, glass, and fabrics to design a space that reflects your style. Rugs and pillows add warmth, depth, and dimension to any room. Don’t be afraid to mix and match different textures to achieve the desired look. 6. Artwork Art can act as both a focal point and a conversation starter, so chose pieces that are unique and add a touch of personality to your space. Experiment with different art styles and sizes, from small prints to oversized murals, to create the desired look. 7. Furniture Just like lighting, furniture plays a crucial role in the overall look and feel of your apartment. Invest in modern, functional pieces that reflect your personal style. You can also opt for multipurpose furniture that does double duty, such as a sofa bed or an ottoman that doubles as storage space. Final Words By following these 7 tips on how to decorate an outdated apartment, you can give your living space a modern look that reflects your personal style. Remember, you don’t need a complete renovation to make an impact. Small accessories, such as throw pillows and artwork, can go a long way in transforming your space. So, embrace your inner designer, and let your creativity run wild!

7 Tips On How To Decorate An Outdated Apartment Read More »

How To Declutter Your Living Room

How To Declutter Your Living Room

Decluttering your living room is a crucial step in creating a peaceful and organized space for your family and guests. Your living room serves as a hub for relaxation, entertainment, and quality time spent with loved ones.  However, it’s all too easy for this multifunctional space to become cluttered with items that belong elsewhere in your home, resulting in a disorganized and chaotic environment. To effectively declutter your living room, follow these simple steps that will help you create a more spacious, inviting, and aesthetically pleasing space. By implementing these strategies, you can transform your living room into a haven of tranquility and comfort. Easy Tips for Decluttering Your Living Room Do General Pick Up Every Day To prevent your living room from becoming excessively cluttered, it is not necessary to wait until it reaches a state of disarray. By dedicating a few minutes every evening to tidying up and organizing, you can effectively prevent the clutter from becoming overwhelming.  This can be achieved by picking up any toys that may have been left on the floor, returning games to their designated places, and ensuring cups and glasses are placed back on stands or the coffee table. Implementing these practices consistently will help maintain a clutter-free living space. Get Your Entire Family Involved Encourage active participation from all family members in the decluttering process of the living room. As a shared communal area, the living room often accumulates miscellaneous items from each family member.  By enlisting everyone’s assistance in the decluttering efforts, the task can be efficiently accomplished in a timely manner. This cooperative approach ensures a thorough and organized living space for the whole family to enjoy. Set Up A System Once you have finished decluttering your living room, it is important to establish an efficient and effective system for managing incoming mail and other disposable items. By promptly disposing of these items in the recycling bin or trash, you can prevent clutter from accumulating and eliminate the need for future decluttering efforts. This proactive approach will save you time and ensure that your living space remains tidy and organized. How To Declutter Your Living Room Step-by-Step To effectively declutter your living room, consider following these straightforward steps that will simplify and streamline the task at hand. By implementing these recommendations, you will achieve a cleaner and more organized living space, creating an environment that promotes relaxation and functionality. 1. Collect Items that Go in other Rooms in a Basket It is often common to find items in the living room that actually belong in the kitchen or a bedroom. Taking the time to return these items to their rightful places as you come across them can result in significant time wasted.  To prevent this, consider using a basket to conveniently collect items that pertain to the kid’s room or other areas of the house. Then, systematically go from room to room, returning each object to its proper location.  This approach eliminates the need to constantly work around these misplaced items and allows for a more efficient decluttering of the living room. By implementing this method, you can save valuable time and avoid unnecessary back-and-forth trips between rooms while tidying up. 2. Clear off all Flat Surfaces To start the decluttering process in your living room, begin by clearing off all the flat surfaces including the coffee table, stands, entertainment center, and floors. Flat surfaces tend to accumulate items that lack a designated spot, forgotten belongings, and overall clutter that no longer belongs in your home. These surfaces are prominent clutter hot spots, and your living room likely contains a significant number of them, such as the coffee table, end tables, and bookshelves. Dedicate time to sort through old magazines, DVDs, and books to create more available space on your shelves. Additionally, make sure to discard any waste that may be lying around and put away books, games, and controllers. By following these steps, you will create a more organized and tidier living space. 3. Declutter Old Décor To achieve a clutter-free and clean living space, it is important to clear away old decor. While adding pieces that bring joy is delightful, accumulating too many decor items can result in a cluttered and crowded environment. If you feel that your living room is overwhelmed with clutter, there is a quick fix. Take a moment to assess your bookshelves and remove any excess decor items. This simple action will allow your shelves to appear more open, organized, and devoid of unnecessary items. Benefit from a serene and pleasant living space by keeping your decor choices concise and purposeful. 4. Sort and Declutter Electronic Cords and Accessories When organizing your electronic cords, remotes, and accessories, it’s important to avoid the common problem of them becoming a jumbled mess. To prevent this, start by labeling each cord to identify which device it belongs to.  Additionally, take the time to check for any extra cords that may be lying around from previous devices. Dispose of any outdated remotes that no longer serve a purpose and consider consolidating your remotes into a universal one.  By doing so, you can conveniently store away the remaining remotes, minimizing the daily cleaning tasks you’ll have to tackle. 5. Check Out those Throw Pillows Throw pillows are a wonderful addition to your living room, offering both comfort and a pop of color. However, it’s important to note that worn-out pillows not only have a negative impact on the aesthetics of your space but can also leave behind debris, causing additional cleaning and maintenance.  To maintain a clean and organized living area, take a few minutes to inspect your throw pillows and dispose of any that have reached the end of their lifespan. Moreover, it’s crucial to avoid excessive clutter by limiting the number of throw pillows you have. Choose only those that serve a functional purpose, enhancing the overall appeal of your room rather than detracting from it. By following these guidelines, you can ensure that your

How To Declutter Your Living Room Read More »

How To Maintain Your Motivation To Declutter

How To Maintain Your Motivation To Declutter?

Maintaining motivation throughout the decluttering process can be a common challenge. In the beginning, it’s typical to feel excited and motivated to tackle the task. However, it’s not uncommon to start feeling overwhelmed or find it difficult to dedicate time to complete the tasks. External factors, such as lack of support from family members, can also contribute to a decrease in motivation. It’s important to remember that these feelings are not unique – many people have experienced them at some point. It’s crucial to address these challenges head-on and develop strategies to overcome them.  Creating a well-structured plan, breaking down tasks into smaller, manageable steps, and seeking support from family or friends can greatly help in maintaining motivation throughout the decluttering journey. I personally have experienced these difficulties and can empathize with anyone facing similar obstacles. Maintain Your Motivation To Declutter One of the key factors that helped me overcome those challenging moments was having a well-defined vision of why it was crucial to eliminate clutter and simplify my life. This clarity played a vital role in enabling me to achieve the life I had always dreamt of. Having a clear understanding of my purpose served as my primary source of motivation whenever I encountered obstacles or began to lose motivation. In fact, recalling the reasons behind my aspirations often proved to be the pivotal factor that propelled me forward during those moments when I felt tempted to give up. What Is The Goal When Decluttering? In order to achieve lasting change through decluttering, it is important to establish a clear goal. Consider what you are trying to accomplish by decluttering your home. Are you aiming to: In my personal experience, decluttering was motivated by the desire to have more time for things that truly mattered, rather than constantly dealing with the maintenance and cleaning of unnecessary items that were not being utilized. Once the goal is defined, it is essential to delve deeper and ask yourself WHY you want to pursue this path of decluttering. What are the ways in which decluttering your home can simplify your lifestyle and improve your overall life? If you are uncertain about the ways that decluttering your home and simplifying your life can bring you closer to the life you aspire to, here are nine benefits to consider. Perhaps one of these benefits will align with your motivations and provide you with the necessary drive to embark on the journey of decluttering your home and simplifying your life. Having a More Organized Home Having a dear friend whom I adore is a wonderful thing. However, when I visit her house and ask for something simple like scissors or tape, it becomes quite a challenge for her to locate them. Her drawers are filled with clutter and broken, useless items, lacking any sense of organization. To address this issue, I have taken it upon myself to clean and organize her drawers. Although she appreciates it at the moment, it doesn’t take long for the chaos to return. The root cause of her inability to stay organized is the sheer volume of possessions she has accumulated.  The more stuff we have, the more challenging it becomes to maintain an organized home. The good news is that the opposite is true as well: the less stuff we accumulate, the easier it is to keep things in order. When striving to sustain motivation in decluttering, remember the numerous benefits it brings. Decluttering not only creates a more organized home, but it also simplifies the task of maintaining that order. You Spend Less Time Cleaning When it comes to household chores, taking the path of least resistance seems to be our natural inclination. For instance, accumulating a larger wardrobe means more laundry piles up, resulting in additional time and effort spent on washing.  The same applies to dishes – owning more dishes only leads to using more dishes, as it’s easier to retrieve a clean cup from the cupboard than to wash one in the sink. Additionally, having an abundance of knick-knacks around the house means more time devoted to dusting, which can be quite tedious. While establishing a cleaning routine can certainly help, the most effective way to minimize the amount of time spent maintaining a clean home is through decluttering and simplifying. By eliminating unnecessary possessions, we significantly reduce the time required for cleaning tasks. This realization serves as a great motivator for me to embark on a decluttering journey and stay organized. You Will Enjoy Your Home More Having a clutter-free and well-organized home is crucial to truly enjoying our living spaces. A chaotic and messy environment can lead to feelings of stress and overwhelm, making it difficult to find a sense of relaxation. However, when we envision our ideal day at home, it involves a clean and orderly house that exudes a peaceful and calm atmosphere. By adopting a minimalistic approach and living with fewer possessions, we can create an atmosphere that enables us to cherish our homes for the memories we form and the connections we forge with our loved ones.  Embracing a lifestyle of simplicity not only keeps our living spaces cleaner and more organized, but it also frees up valuable time for us to focus on what truly matters to us. So, let’s strive for a clutter-free home that reflects our desired sense of tranquility, allowing us to fully appreciate the true essence of our living spaces. You Are More Productive When our lives become cluttered with unnecessary possessions, our attention becomes divided. Devoting time, energy, and focus to our belongings hampers our ability to fully concentrate on our dreams and aspirations. It’s a universal desire to have more time and energy to dedicate to our goals and priorities. I assure you, decluttering and simplifying is an effective approach to achieve this. Research repeatedly confirms that multitasking significantly hinders productivity. By embracing a minimalist lifestyle, you can eliminate or reduce divided focus. Consequently, your productivity will soar, enabling you to

How To Maintain Your Motivation To Declutter? Read More »

New Year’s Decor Ideas

10 Simple New Year’s Decor Ideas

As the clock strikes midnight on December 31st, it is time to bid farewell to the old year and warmly welcome the new year. A key element to ensure a festive and hopeful beginning is by adorning your space with captivating decorations.  Whether you are hosting a lively gathering or relishing a tranquil evening with cherished ones, these 10 simple New Year’s decor ideas will assist you in crafting a memorable atmosphere that will leave a lasting impression. Glittering Balloon Bouquets Elevate the ambiance of your space by incorporating glamorous balloons adorned with shimmering glitter and striking metallic accents. For an elegant touch, consider a combination of gold, silver, and black hues. Opt to arrange them in beautiful bouquets or artfully scatter them around the room, creating a whimsical and captivating effect that will leave your guests in awe. Festive Garlands Garlands are a highly versatile and decorative element that can elevate the ambiance of various spaces. They can be skillfully utilized to adorn walls, mantels, or tables, adding a touch of elegance and visual appeal. For a touch of enchantment and radiance, it is worth considering the use of metallic or glitter garlands.  Additionally, you have the opportunity to unleash your creativity by crafting your very own garlands, using a wide array of materials ranging from paper, fabric, to even dried flowers. This allows for a personalized and unique touch that is sure to captivate onlookers. Champagne Bottle Centerpieces Empty champagne bottles can be repurposed to create stunning centerpieces, making use of fairy lights, tinsel, or even small ornaments. These can be arranged in clusters on your dining table or scattered around the room to achieve a chic and celebratory ambiance. This simple yet effective DIY idea can elevate the overall aesthetic of your space, adding an elegant touch to any occasion. Confetti Poppers and Cannons As you prepare to welcome the New Year, enhance the celebratory ambiance with a delightful burst of confetti. Elevate the experience for your guests by offering them confetti poppers or cannons, ensuring a memorable and interactive element that adds a touch of excitement and joy to the occasion. This surefire way to create a festive atmosphere guarantees an unforgettable celebration. Glowing Candlelight Candles have the remarkable ability to create a warm and inviting atmosphere. To enhance your space, thoughtfully arrange a diverse assortment of candles in different sizes and unique shapes. For a touch of elegance, you might even consider utilizing metallic or glittery candle holders, adding an extra level of sophistication and glamour to your surroundings. Glitzy Table Settings To enhance your dining experience to a whole new level, consider incorporating glamorous table settings. Opt for metallic or sequined table runners, complemented by elegant dinnerware and sparkling glassware. For an added touch of sophistication, don’t forget to include fresh flowers or evergreen branches to introduce a natural contrast and elevate the overall aesthetic. Countdown Clock Decor To enhance the excitement leading up to the stroke of midnight, consider incorporating a countdown clock as part of your decor. There are various options to choose from, such as a stylish wall clock or even a DIY countdown that allows you to flip the numbers as the anticipated moment approaches. This addition will not only add visual interest but also build anticipation among your guests, creating a memorable atmosphere for your New Year’s Eve celebration. Photo Booth Fun For an enhanced guest experience, consider setting up a dedicated photo booth area at your event. Provide guests with an assortment of props such as hats, glasses, and boas to create fun and memorable moments. To add a festive touch, consider adding a decorative backdrop that complements the overall theme and ambiance of the evening. This thoughtful addition will encourage your guests to capture and preserve their enjoyable memories throughout the event. Festive Wall Art To enhance the ambiance of your walls during the New Year, consider embellishing them with a delightful assortment of New Year-themed artwork or engaging in do-it-yourself crafts. One captivating idea is to create a collage showcasing memorable moments from the past year, which will evoke fond memories and nostalgia.  Additionally, you can hang up inspiring quotes and resolutions for the upcoming year, serving as constant reminders of your goals and aspirations. This creative endeavor will not only add visual appeal to your space but also provide a meaningful and expressive touch that embodies the spirit of the New Year. New Year’s Wishing Tree To create a captivating ambiance during the event, consider setting up a beautifully adorned wishing tree where guests are invited to share their hopes, dreams, and resolutions for the upcoming year. Provide them with personalized cards and writing utensils, ensuring that they have the means to express their wishes with creativity and clarity. Encourage guests to hang their heartfelt aspirations on the tree, symbolizing the collective desire for positivity and hope as we kickstart the new year. Final Verdict With these 10 elegant and effortless New Year’s decor ideas, you can effortlessly transform your space into a captivating and unforgettable setting for your celebration. Whether you envision a lavish display of glitz and glamor or a refined and understated ambiance, there are a plethora of options available to impeccably match your personal style and preferences. Let us raise our glasses to a new year brimming with boundless joy, love, and infinite opportunities that are waiting to be embraced!

10 Simple New Year’s Decor Ideas Read More »

Small Bedroom Decorating Ideas

8 Easy And Cheap Small Bedroom Decorating Ideas

Are you tired of feeling cramped in your small bedroom? Do you avoid spending time in your room because it doesn’t feel cozy and inviting? You’re not alone.  Luckily, there are plenty of easy and cheap ways to decorate your small bedroom and make it feel like your own personal oasis. In this blog post, we’ll provide you with eight simple decorating ideas that won’t break the bank. Choose 2 Complementing Colors And Weave Black, White, And Metal Throughout When it comes to easy and budget-friendly small bedroom decorating ideas, one crucial aspect to consider is the color scheme. Your entire room and its decorations will revolve around the color pairing you choose. Thus, invest some time now to find a combination that you truly love. Moreover, a cost-effective way to completely transform your small bedroom is to apply a fresh coat of paint. This step not only revitalizes the space but also helps you stick to your budget. Now, let’s dive deeper into setting the right mood for your bedroom. Ask yourself what ambiance you want to create. Do you aim to make your room appear larger and more spacious? Would you like it to exude a calm spa-like atmosphere?  Or do you prefer to go bold and showcase your creative side? Deciding on the desired mood first will guide you in choosing the perfect color scheme that aligns with your vision. Colors To Make Your Small Bedroom Appear Larger To create an illusion of a larger and more spacious room, opting for contemporary and minimalist design colors is recommended. It is advised to stick to neutral tones such as grays, beiges, whites, and blacks.  It’s always helpful to have visual references to make an informed decision. Here is an example of this color scheme that personally stands out (and I personally love!). Colors To Make Your Small Bedroom Be Bold & Show Off Your Creative Side If you’re looking to make a bold statement and showcase your creativity, choosing two colors that complement each other and work well with black and white can be an excellent choice. One color combination that I personally love is navy blue and tan/orange.  This particular color scheme pairs exceptionally well with older homes adorned with dark, reddish/orange wood accents. For instance, my parents’ stunning 1970s home features wood trim and fireplace stone that perfectly capture the essence of that era.  Instead of investing a significant amount of money into completely replacing the trim and stone, we have decided to incorporate richer tones with other colors like navy, white, and black.  This approach will not only complement the existing elements but also create a cohesive and visually appealing aesthetic. Remember, with the right combination of colors, any old object or space can be transformed into something truly beautiful. Another suggestion would be to explore a deep teal and purple mauve combo, which can help you tap into your moody side while maintaining a sophisticated vibe. If you decide to go with a darker shade, I would suggest painting only one wall in that color. By creating an accent wall, you can create the illusion of a larger and more visually appealing small room.  Painting the entire room in this dark shade, on the other hand, may have the opposite effect and make your small bedroom appear even smaller than before. It’s important to consider these factors when making your design choices. Colors To Make Your Small Bedroom Feel Like A Spa To create the illusion of spaciousness and a serene spa-like atmosphere in a small bedroom, consider opting for a light accent color, such as light green or light blue, as displayed in the picture.  Additionally, choose colors and decor that bring joy to your life. Incorporate white, black, and one metallic color (satin nickel, chrome, gold, or black) throughout your design to consolidate and enhance the overall color scheme.  This approach leverages the versatility of white and black as neutral colors to harmonize the various elements, while the metallic color adds a subtle contrast and texture that complements the chosen color scheme proficiently.  By adopting this strategy, you can effectively maximize the visual appeal and ambience of your small bedroom while maintaining a tranquil and cohesive aesthetic. Having Trouble Choosing A Color Scheme That Fits You Best? When it comes to choosing paint colors, it can be quite a challenging task. Personally, I believe that paint colors are one of the hardest decisions to make. In fact, I had such a difficult time deciding on the color for our 1950s ranch that I ended up changing my mind not once, not twice, but THREE different times.  You can imagine the amount of paint I wasted – a total of $60 worth! It was a true display of indecision. Needless to say, my husband wasn’t too thrilled about it. The main issue was that I didn’t have an easy way to move and test my paint samples in each room, especially since not all rooms had drywall yet. Those tiny samples you pick up at the store just don’t cut it.  But then, I stumbled upon a company called Samplize. They specialize in providing large sticker-like paint swatches that can be easily moved around without causing any damage to your walls. Oh, how I wish I had known about their products earlier! Using their products would have saved me a significant amount of time, effort, and money. On top of the $60 worth of paint that I bought, I also purchased $20 worth of paint samples and $5 worth of paint rollers. However, upon reflection, I realized that I could have saved both money and a lot of trouble by opting to spend $20 on Samplize stickers instead.  Not only would this have allowed me to move my large paint sample around to different lighting conditions, but it also would have spared me from the disappointment of colors not turning out the way I anticipated. In retrospect, I am inclined to order

8 Easy And Cheap Small Bedroom Decorating Ideas Read More »

How To Declutter Your Laundry Room

How To Declutter Your Laundry Room? 13 Easy Ways!

If you walk into your laundry room and feel like it’s a cluttered mess, you’re not alone. Laundry rooms often become a catch-all space where we store items that don’t have a designated spot.  But just like any other space in your home, decluttering your laundry room can make a big difference in how it feels and functions. In this blog post, we’ll share 13 easy ways to declutter your laundry room and create a more organized space. Set Aside Dedicated Time Designating a specific time for decluttering your laundry room is a proactive way to demonstrate your commitment to self-care. It’s an opportunity to invest in yourself and create a peaceful and stress-free environment, which in turn can have a positive impact on your mental and emotional well-being.  By taking care of your surroundings and organizing your laundry room, you’ll experience a sense of accomplishment and satisfaction, knowing that you are creating an organized and efficient space that supports your daily routine and reduces unnecessary stress. Empty The Room Beginning with a blank canvas, the act of completely emptying your laundry room enables a comprehensive assessment of each item present, facilitating deliberate decisions on what to retain.  Thus, this cathartic exercise not only provides a fresh start for both your physical surroundings and mental state but also leads to decluttering that fosters mental clarity and infuses your self-care journey with a renewed sense of purpose and fulfillment. Sort And Categorize Organizing and grouping items in your laundry room presents a valuable opportunity to cultivate mindfulness. By intentionally focusing on each item individually, you can develop a heightened awareness of your possessions and their significance in your life.  This mindful approach to decluttering fosters a sense of clarity and control, empowering you to prioritize self-care by intentionally selecting objects that bring you joy and enhance your overall well-being. Assess Usefulness When decluttering, it is crucial to evaluate the usefulness of each item. By doing so, you can create a more functional and efficient laundry room by letting go of items that no longer serve a purpose.  This intentional act of simplification not only reduces physical clutter but also frees up mental space. As a result, you will have more time and energy to focus on self-care activities that nurture your overall well-being. Declutter Surfaces Creating a visually appealing and calming space involves clearing off countertops and shelves. A clutter-free environment can significantly impact your mental state by reducing stress and promoting relaxation.  Therefore, when your laundry room is organized and free of distractions, you’ll find it easier to engage in self-care activities that rejuvenate your mind, body, and spirit. This will ultimately contribute to your overall well-being and enhance your daily life experiences. Create Storage Zones Designating specific areas for different categories of items is an effective organizational strategy that can improve efficiency and save you valuable time and effort. It ensures that you can easily locate items when you need them, minimizing the need for time-consuming searches. Furthermore, implementing this strategy in your laundry room can have additional benefits beyond organization. A well-organized laundry room creates a supportive environment that not only facilitates self-care but also encourages and promotes its regular practice. Utilize Vertical Space Optimizing storage space in your laundry room can be achieved through strategic utilization of wall-mounted shelves or cabinets. This not only maximizes storage capacity but also cultivates a sense of openness.  Furthermore, a clutter-free floor area creates a greater sense of freedom and spaciousness. Additionally, organizing your laundry room enhances its functionality, creating a more relaxing and inviting atmosphere and contributing to an overall improved self-care experience. Organize Containers Organizing small items in clear containers or baskets is an effective way to bring order and accessibility to your laundry room. By assigning each item a designated place, you can avoid the frustration of searching for them when needed.  This simple and efficient approach not only saves time but also enhances the overall functionality and convenience of your laundry room. Additionally, by joining this esteemed organization, individuals can experience a reduction in stress levels, allowing them to allocate more time and energy for engaging in self-care activities that are imperative for promoting relaxation, overall well-being, and a balanced lifestyle. Efficiently Store Laundry Supplies Keeping frequently used laundry supplies within easy reach is a highly effective way to streamline your laundry routine.  When these supplies are readily accessible, you save valuable time and energy, which can be invested in various self-care activities to enhance your overall well-being.  Additionally, simplifying your laundry process not only creates more physical space but also frees up mental space for engaging in self-nurturing practices that contribute to your overall sense of wellness and fulfillment. Simplify Cleaning Supplies In order to achieve a more streamlined and efficient cleaning routine, it is highly recommended to reduce the number of cleaning products used and opt for multi-purpose cleaners.  By minimizing clutter and simplifying your cleaning approach, you not only save physical space but also valuable time and energy that can be redirected towards self-care activities.  This, in turn, allows for greater opportunities to prioritize self-care and relaxation, promoting overall well-being and a healthier lifestyle. Maximize Space With Hangers By hanging laundry bags or hampers on the back of doors, you can optimize space utilization and keep the floor clear. This organization not only promotes a sense of order and tidiness in your laundry room but also makes it easier to navigate the space and maintain a serene environment.  Additionally, when your laundry room feels well-structured, it contributes to an overall atmosphere of self-care and calmness, enhancing your overall experience.  Therefore, incorporating this simple yet effective solution can greatly improve the functionality and aesthetics of your laundry area. Properly Dispose Of Waste Ensuring proper waste disposal practices is crucial for maintaining a clean and healthy environment. By disposing of waste in an organized and responsible manner, you contribute to the well-being of both yourself and the ecosystem. In particular, having a well-organized and hygienic

How To Declutter Your Laundry Room? 13 Easy Ways! Read More »

Scroll to Top