https://pagead2.googlesyndication.com/pagead/js/adsbygoogle.js?client=ca-pub-9463394879326171 crossorigin="anonymous">

Author name: Louis Dioso

best-air-purifiers

The 9 Best Air Purifiers For A Cleaner Home

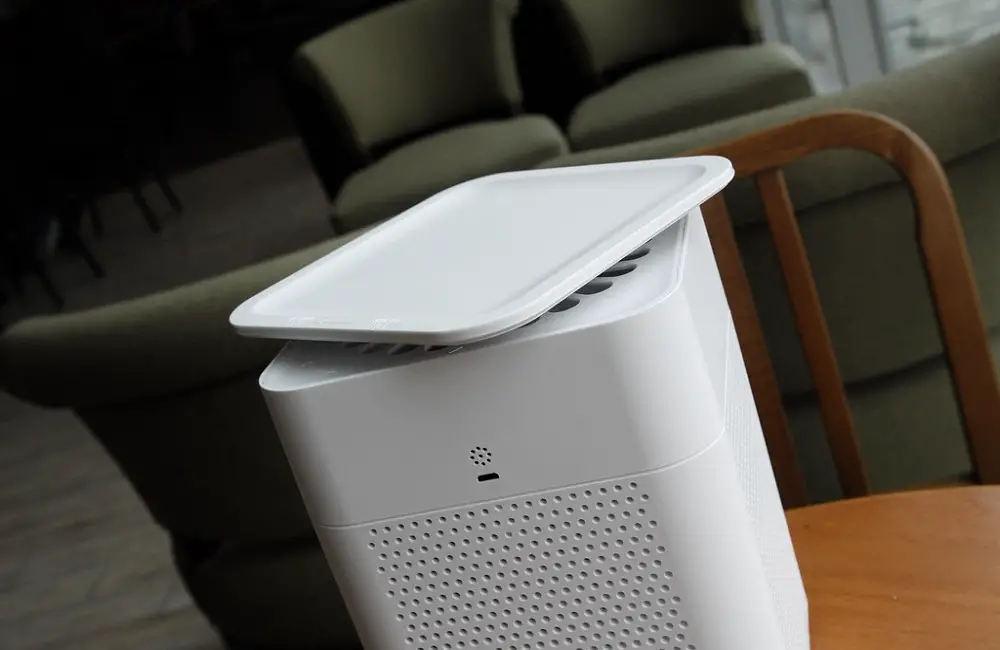
Welcome to our guide on “The 9 Best Air Purifiers For A Cleaner Home”! In today’s world, where indoor air quality is more important than ever, finding the right air purifier can make a significant difference in the cleanliness and freshness of your home environment.  Whether you’re looking to combat allergens, eliminate odors, or simply breathe easier, we’ve curated a list of the top air purifiers on the market to help you achieve a healthier living space.  We’ve compiled a thorough collection of alternatives to fit every need and inclination, from small bedroom devices to powerful units that can purify huge spaces.  Come along as we examine the features, advantages, and effectiveness of these nine exceptional air purifiers to see which one is best for your house. Together, let’s embark on a journey towards an indoor environment that is fresher, cleaner, and healthier! What to Know Before You Get Started Air purifiers come equipped with various types of filters designed to target specific contaminants like dust, smoke, and allergens. To ensure you select the most suitable air purifier for your home, it’s crucial to understand the different filter options available. Our Top Picks Levoit Core 400S Smart Air Purifier The Levoit Core 400S stands out as our top choice among the air purifiers we’ve tested, boasting impressive efficiency, quiet operation, a feature-rich design, and compatibility with smart home systems. This purifier utilizes an H13 True HEPA filter as part of its three-stage filtration process. The pre-filter targets larger debris like lint and pet hair, while the H13 True HEPA filter effectively removes 99.9 percent of bacteria and viruses, as well as at least 99.97 percent of airborne particles measuring 0.3 microns, including pollen. Additionally, the carbon filter tackles pollutants such as smoke, VOCs, and various odors. In our recent testing, we also evaluated the Levoit Core 300S, which proved to be equally effective at purifying air as its larger counterpart. The main distinction between the two models is their coverage area: 219 square feet for the 300S and 403 square feet for the 400S. If you’re looking to purify air in a smaller room, the 300S is the more suitable choice. Both models come pre-assembled and are easily connected to the accompanying app via a QR code scan. The app offers convenient features like timers and schedules, in addition to real-time monitoring of PM 2.5 levels. Moreover, the purifiers can be controlled via voice commands through Alexa and Google Assistant, enhancing accessibility. Despite its powerful performance, the Levoit Core 400S maintains a sleek silhouette that won’t detract from your decor. Its noise level is impressively low, especially in sleep mode, making it suitable for quiet environments. Even on its highest setting, the noise level is tolerable and unlikely to disrupt activities like watching TV. However, individuals sensitive to noise may find the higher setting less conducive to sleep, depending on their preference for white noise. Overall, both the Levoit Core 300S and 400S are excellent choices for purifying indoor air effectively. The 400S is particularly well-suited for larger rooms, making it our preferred option. Honeywell InSight HEPA Air Purifier It’s no surprise that Honeywell’s InSight HEPA HPA5300 Air Purifier garnered significant attention during our testing. With Honeywell’s longstanding reputation as a leader in the air quality industry, we’ve come to expect reliability and effectiveness from their products.  The InSight series stands out with its innovative air quality indicator light, which provides instant feedback on your home’s air quality—green for good, orange for moderate, and red for poor. We particularly appreciated the convenience of the auto mode, which adjusts the fan speed automatically to maintain optimal air quality. Setting up the HPA5300 is a breeze, and its slightly larger size compared to other models is a minor trade-off for its exceptional performance. This air purifier boasts three levels of filtration: a pre-filter to combat household odors and VOCs, a HEPA filter for capturing airborne particles, and an optional enhanced odor filter (sold separately) to tackle specific odors like those from kitchens, pets, or home renovations. During our testing, we observed noticeable improvements in air quality and odor reduction in the room. Due to its powerful filtration system and fan, this air purifier does produce some noise, particularly at higher fan speeds. However, even at its maximum setting (turbo mode), the noise level remains below 60 decibels, making it suitable for use in family rooms or bedrooms with minimal disturbance.  The HEPA filter only needs replacing once a year, and replacement filters are available in packs of three for around $75, which is in line with industry standards. While the initial cost of the air purifier may seem steep at over $300, its ability to provide real-time air quality monitoring without the need for additional smart devices makes it a worthwhile investment for those seeking simplicity and effectiveness in air purification. Clorox Large Room Air Purifier Investing in an air purifier is a significant decision, especially when considering the ongoing costs of maintenance in addition to the initial purchase price. We were highly impressed not only by the performance of the Clorox Large Room Air Purifier but also by its affordability, with a price tag under $200 and reasonable ongoing expenses for filter replacements and energy consumption. At just $60 to replace, the filter and an estimated yearly energy cost of around $45, this purifier offers an excellent value proposition for budget-conscious households. Setting up and operating this air purifier is a hassle-free experience. The intuitive control panel ensures effortless navigation through various settings, making it user-friendly for all. Additionally, its 360-degree filtration system ensures thorough circulation of air throughout the room, providing comprehensive purification. While the design may not be the most stylish compared to other options on the market, its effectiveness in purifying the air outweighs any aesthetic considerations. The digital display provides real-time feedback on the room’s air quality, including the PM 2.5 rating, with a color-coded light indicating air quality levels from green to maroon. Despite its

The 9 Best Air Purifiers For A Cleaner Home Read More »

How to Choose a Coffee Table

How to Choose a Coffee Table for Your Home in 8 Easy Steps

Coffee tables are a staple piece of furniture in most living rooms, serving as both a functional and aesthetic centerpiece. With countless styles, shapes, and materials available, selecting the perfect coffee table can feel like a daunting task.  However, fear not! In this comprehensive guide, we’ll break down the process into 8 easy-to-follow steps, ensuring that you choose a coffee table that not only complements your space but also meets your needs and reflects your personal style. 1. Function First When choosing a coffee table, it’s essential to consider its primary function. Will it primarily serve as a surface for drinks and snacks, or do you need it for storage purposes? Perhaps you require a sturdy table for board games or a multifunctional piece that can double as extra seating when entertaining guests.  By determining how you’ll use the table, you can narrow down your options and prioritize features that align with your lifestyle. 2. Colour & Style Once you’ve identified the functional requirements, it’s time to think about the aesthetics. Consider the existing decor of your space, including the color palette, furniture style, and overall ambiance.  Do you prefer a modern, minimalist look, or are you drawn to more traditional or eclectic designs? Take cues from your existing decor to guide your choice of color and style for the coffee table, ensuring that it complements the space seamlessly while adding visual interest and personality. 3. Material is Everything The material of your coffee table plays a significant role in its appearance, durability, and maintenance requirements. Common options include wood, metal, glass, and stone, each offering its own unique characteristics and aesthetic appeal. Wood, for example, provides warmth and versatility, with various finishes and grains to choose from.  Metal offers a sleek and modern look, while glass adds an elegant touch and creates a sense of spaciousness. Consider factors such as durability, ease of cleaning, and compatibility with your existing furniture when selecting the material for your coffee table, ensuring that it meets both your practical and aesthetic needs. 4. Choosing a Shape Coffee tables come in a variety of shapes, including square, round, oval, and rectangular. The shape you choose should complement the layout of your furniture and the overall flow of the room. A round table, for example, works well in smaller spaces, where its curved edges help to soften the room’s aesthetic and improve traffic flow. In contrast, a rectangular table can anchor a large seating area, providing ample surface area for drinks, snacks, and decorative items.  Consider how people will navigate around the table and choose a shape that enhances the functionality of the space while maintaining visual harmony. 5. The Right Width When selecting the width of your coffee table, aim for balance. It should be proportionate to the size of your seating area, allowing for easy access to seating without overcrowding the space. As a general rule of thumb, the table should be about two-thirds the length of your sofa to maintain visual harmony.  Consider the scale of your furniture and the overall layout of the room when determining the appropriate width for your coffee table, ensuring that it complements the space without overwhelming it. 6. Coffee Tables for Big Rooms In larger rooms, you have the luxury of choosing a larger coffee table to fill the space. However, be mindful not to overpower the room with an oversized table. Instead, consider using multiple smaller tables or a combination of a larger statement piece and smaller accent tables to create visual interest and functionality.  This allows you to customize the layout to suit your needs while maintaining a cohesive look throughout the room. Experiment with different configurations and arrangements to find the perfect balance of scale and proportion for your space, ensuring that the coffee table enhances the overall aesthetic and functionality of the room. 7. Avoiding Height Blunders The height of your coffee table is crucial for both aesthetics and functionality. It should be approximately the same height as the cushions of your sofa or slightly lower, ensuring comfortable access to the table without straining or reaching.  Additionally, consider the height of surrounding furniture, such as chairs and end tables, and aim for consistency to create a cohesive look throughout the room. Experiment with different heights and configurations to find the perfect balance for your space, ensuring that the coffee table enhances the overall aesthetic and functionality of the room. 8. The Ottoman as a Coffee Table Idea For a versatile and multifunctional option, consider using an ottoman as your coffee table. Ottomans offer soft edges, making them ideal for homes with young children or pets. They also provide additional seating when needed and can double as a footrest.  To enhance functionality, choose an ottoman with a removable tray or storage compartment for added convenience. Additionally, consider upholstering the ottoman in a durable fabric that complements your existing decor, ensuring that it seamlessly integrates into the room’s aesthetic while providing a comfortable and functional centerpiece for your living space. Final Words Choosing the perfect coffee table requires careful consideration of both form and function. By following these 8 easy steps, you can confidently select a coffee table that complements your space, enhances its functionality, and reflects your personal style. Remember to prioritize your needs and preferences, experiment with different options, and have fun creating a stylish and inviting centerpiece for your living room. So go ahead, sip your coffee, and enjoy the stylish centerpiece of your living room!

How to Choose a Coffee Table for Your Home in 8 Easy Steps Read More »

10 Ways to Organize Your Books

10 Ways to Organize Your Books

Organizing your book collection can be both a functional and aesthetically pleasing endeavor. Whether you’re an avid reader, a collector, or simply want to tidy up your space, finding the right method to arrange your books can make a world of difference. From showcasing your favorites to optimizing space, here are 10 ways to organize your books. Organize by Color One of the most visually striking methods is to organize your books by color. This creates a vibrant display that can serve as a focal point in any room. Grouping books by hue can also help you quickly locate specific titles based on their cover colors. Pick Modern Shelves Investing in modern shelves can not only add a contemporary flair to your space but also provide functional storage for your books. Sleek designs with clean lines can complement various interior styles while efficiently displaying your collection. Stack Them For a more relaxed and casual look, consider stacking your books. This method works particularly well on coffee tables, sideboards, or floating shelves. Experiment with different stack heights and orientations for added visual interest. Fill a Basket If you prefer a cozy and rustic feel, gather your books in a decorative basket. This approach not only keeps your books organized but also adds texture and warmth to your space. Place the basket in a corner or next to your reading nook for easy access. Play With Horizontal Stacking Mixing horizontal stacks with traditional vertical arrangements can add depth and dimension to your bookshelves. Lay some books flat and stack others vertically to create visual contrast and break up the monotony. Mix Them In Don’t be afraid to mix books with other decorative elements such as plants, artwork, or trinkets. Interspersing objects among your books adds personality and character to your shelves, turning them into curated displays. Try Alphabetical For those who prioritize functionality and ease of access, organizing books alphabetically by title, author, or genre is a tried-and-true method. This approach simplifies the process of finding specific books and maintaining order within your collection. Organize by Height Arranging books by height can create a sense of symmetry and balance on your shelves. Start with the tallest books on the ends and gradually decrease in height towards the center. This method creates a visually pleasing cascade effect. Arrange by Genre If you have a diverse collection spanning different genres, consider organizing your books by category. Group similar genres together to create dedicated sections for fiction, non-fiction, mystery, science fiction, and more. This makes it easier to browse and find books based on your mood or interests. Place Large Books Near the Bottom To avoid overpowering smaller books or creating instability, place heavier, larger books on the lower shelves when arranging books on shelves. This guarantees simpler access to these heavier books without requiring undue effort or running the risk of harm. Final Thoughts By employing these 10 methods, you can transform your book organization from mundane to magnificent. Whether you prioritize functionality, aesthetics, or a combination of both, there’s a method that suits your style and space. Experiment with different techniques until you find the perfect arrangement that reflects your personality and enhances your reading experience.

10 Ways to Organize Your Books Read More »

Cabinet Painting Mistakes

9 Cabinet Painting Mistakes and How to Avoid Them

To be quite honest, this is a list of all the mistakes I made when painting our bathroom cabinets for the first time rather than a how-to guide on painting cabinets. which, in my perspective, were fantastic lessons learned. However, once I’m a little more comfortable with my method, I’ll probably write a comprehensive tutorial. It would be an understatement to say that this cabinet painting project terrified me. I was so afraid I would damage our bathroom cabinets and end up spending a fortune on paint. I did, incidentally, spend some money on paint. However, that’s alright, lessons learned, right? What specifically are the cabinet painting faux pas that I discovered the hard way? Cabinet Painting Mistakes and how to avoid them Not Labeling Doors I totally disregarded the professional suggestion to identify the cabinet doors after removing them because I was so excited to begin our latest project. I didn’t understand how much of a hassle this error was until after I had painted everything and attempted to reinstall all of our doors and drawer fronts. The doors and drawers were misaligned, causing us to spend an excessive amount of time trying to realign them with their original hinges. If I had labeled the original source of each one, I could have probably saved myself at least an hour. Not Properly Prepping I think I did a very excellent job on this step, but it’s still important to highlight because, when it comes to painting cabinets, this is by far THE BIGGEST mistake I’ve seen people make when they do DIY projects for the first time. It takes up the most time throughout the procedure as well. All surface surfaces that are going to be painted must be thoroughly cleaned, degreased, and sanded to guarantee that your paint will stick. Not using Primer Despite what some how-to guides may tell you, you should always apply primer before painting your cabinets. Similar to the preparation work, I took care to not omit this step. However, I’ve seen what occurs when you do. One of the main causes of paint not adhering to cabinets is improper priming. It’s excellent at preventing stains and tannins from penetrating through lighter paint colors, in addition to ensuring that your paint adheres to the cabinets’ surface. One of the greatest methods to prevent paint from eventually peeling off cabinets is to prime them first. Sanding too much This is more of a time waster than an error, in my opinion. When I originally started painting our bathroom cabinets, I mistakenly believed that in order to expose the raw wood, you had to sand down past the stain. I took a picture of my work because I was so proud of my sanding efforts and forwarded it to my friend, who also happens to be a skilled cabinet painter. She quickly informed me that all I had to do was roughen up the surface in order for the primer to stick, and that I was lucky not to be painting my cabinets white because all the extra sanding I had done might have allowed the light paint to seep through to the wood. You could argue that trying to paint cabinets without sanding at all is probably just as harmful as oversanding them. Using Cheap Tools You must be prepared to spend money on some quality tools for your job if you want to learn how to paint cabinets like the pros. During my DIY endeavors, I’ve gone through two reasonably priced paint sprayers, but they both broke, and I didn’t feel like shelling out a lot of money for a new one for this task. I bought a very inexpensive spray gun, and I was rather dissatisfied with the paint’s finish because you get what you pay for. My project took weeks longer to complete as a result of using this inexpensive gear because I had to keep fixing uneven spray jobs and sand and repaint multiple times. Invest in a good paint sprayer to save yourself the headache. Nothing beats spray painting your cabinets to get a glass-like surface, even with the best cabinet painting roller you can buy. Using Cheap Paint You will pay a little bit more for the best cabinet paint, but the benefits are well worth it. I’ve probably read evaluations of at least a hundred cabinet paint products. However, if you believe a cheap kit from the hardware store can give you a nice look, simply run. Not Letting the Paint Cure Long enough When painting cabinets, get ready to play the waiting game. Be sure you follow the manufacturer’s directions regarding drying time before attempting to sand in between layers or add second coats. Your paint job could get damaged if the paint hasn’t completely dried and hardened. Or even worse, being so eager to apply a second coat that I tried to manually sand down a gummy surface. I didn’t realize till much later that my paint doesn’t really cure for a complete thirty days! That’s more for regular use than just a quick recoat, though. Therefore, give yourself a little more time to let the doors and drawers dry completely before installing them, or else you risk scratching and scuffing them. Applying the paint too thick I wouldn’t have had to learn this lesson the hard way if I had utilized better tools the first time. Applying paint in thin, equal layers will help you avoid longer drying times, uneven finishes, and even worse, drips, streaks, and bubbles. After finishing our bathroom cabinets, I did some more research and bought a fine paint spray tip for my sprayer to make the paint apply more evenly and lightly, rather than in big, globby globs. I’m fairly certain that the next time around, I won’t wind up with huge bubbles like this. Rushing the process Refinishing cabinets is a task not to be undertaken lightly. You sometimes need a strong sense of humor in addition to

9 Cabinet Painting Mistakes and How to Avoid Them Read More »

How To Arrange Appliances In Your Kitchen

How To Arrange Appliances In Your Kitchen?

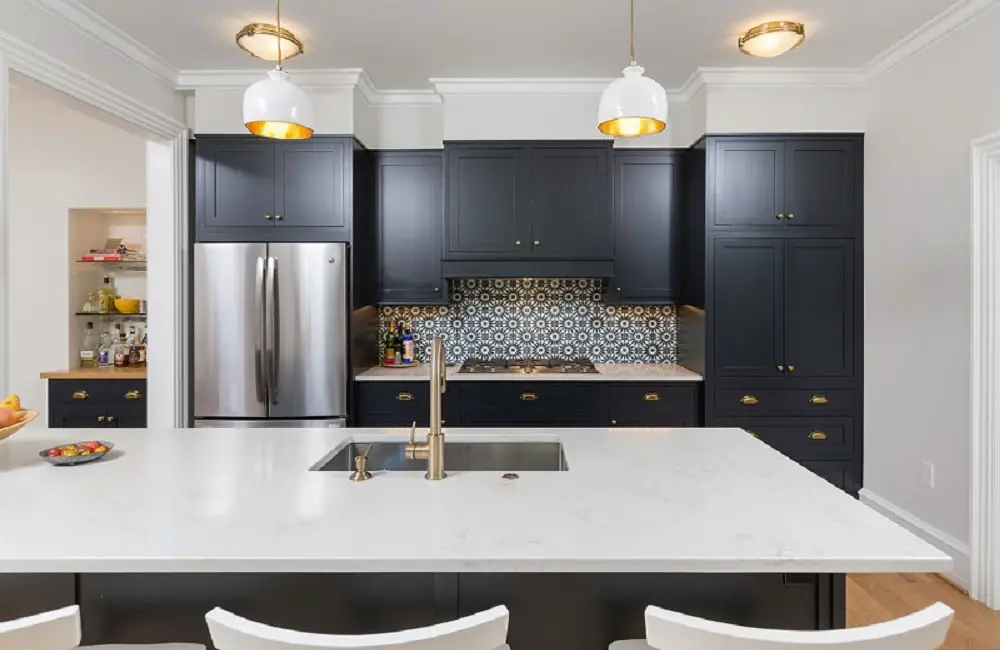
The organization of kitchen appliances is dependent upon the cooking preferences of individuals. One’s frequent use of specific appliances determines their storage in kitchen cabinets.  For example, raw food enthusiasts often prioritize keeping their blender within easy reach. Vegans tend to prioritize quick access to their pressure cooker, while meat-eaters prioritize their slow cooker and indoor grills.  Regardless of one’s cooking preferences, there are four important steps in the process that should be followed for effective organization and functionality of kitchen appliances. Pare Down Your Appliances When it comes to decluttering and organizing your kitchen appliances, it’s crucial to start with the first step: grouping them by use. Categorize them into three groups – frequently used, rarely used, and never used. In cases where kitchen storage space is limited, it becomes even more important to allocate it wisely.  This can be achieved by owning appliances that serve multiple purposes. Take a closer look at your appliances, ensuring that their uses are versatile and not limited to just one function. For instance, consider investing in a high-quality blender that can also function as a food processor. Additionally, evaluate the necessity of owning a panini press if you already have a waffle iron. Furthermore, a stockpot can perfectly cook rice, making a separate rice cooker redundant unless it is part of your daily routine. Banish Your Never-Used Appliances One common issue that many people face is the reluctance to let go of unused appliances. While it may seem like a simple decision, it can often be the most challenging step in decluttering your kitchen.  Consider appliances such as rice cookers, juicers, or egg poachers. If you frequently utilize these appliances, it is prudent to keep them. However, if you have never poached an egg or made a green juice, chances are you will not do so in the future. It is important to assess and allocate your kitchen cabinet storage space for appliances that you genuinely use and benefit from. Donate or Recycle the Appliances You Never Use Unused kitchen appliances can easily find a new home through various avenues. One option is to donate them to a local charity such as Habitat for Humanity, Goodwill, or a local church or house of worship. This not only helps you declutter, but also gives someone else the opportunity to use and appreciate the appliances. Another option is to sell them online platforms like eBay or through a garage sale. In case the appliance is no longer in working order, recycling is a suitable solution. You can check with your local recycling centers to find out if they accept kitchen appliances. Additionally, another option is to donate them to Freecycle, where they can handle the recycling process for you. If you’re uncertain about whether to keep or get rid of an appliance, you can try using the box method. Simply place the appliance in a box and store it out of sight. If, after a month, you find that you still need the appliance, then it’s worth keeping. However, if you never think about it during that time, then it’s probably time to donate, recycle, or sell it. Cut Cabinet Clutter In order to optimize the functionality and accessibility of your cabinets, it is crucial to ensure they are well-organized and easy to navigate. This will contribute to a streamlined and efficient workflow, allowing you to quickly and effortlessly locate items when needed. By implementing effective organizational strategies and utilizing appropriate storage solutions, you can maximize the available space and improve overall efficiency in your storage system. Move Rarely-Used Kitchen Appliances To Storage It is advisable to reserve valuable counter-top or low-cabinet space for frequently used kitchen appliances. For those that are used less often—such as blenders (unless you are a dedicated smoothie maker), food processors, waffle makers, ice cream makers, and slow cookers—it is recommended to store them on a higher shelf.  By doing so, you can optimize your kitchen storage and keep these appliances readily accessible for occasional use, while keeping your countertops clutter-free and organized. Store the Appliances You Use All The Time When it comes to storing kitchen appliances, there isn’t a one-size-fits-all approach. Each individual’s organizing and storage system will depend on their cooking style, the appliances they frequently use, and the available cabinet space in their kitchen. Once you’ve identified the regularly used appliances in your kitchen, it’s important to store them in easily accessible areas. Here are three general guidelines to consider: place frequently used appliances on the countertop or the lower shelf of an upper cabinet to ensure convenient access; reserve the top cabinets for rarely used appliances; and consider selling or donating appliances that are never used. While striving for a clean and clutter-free countertop is a common objective, don’t hesitate to keep some commonly used appliances – such as a coffee maker, blender, or toaster oven – visible and easily accessible on your countertop. Remember, effective kitchen organization involves optimizing the functionality of cabinets, pantry, refrigerator, and appliances themselves. Maintain and Upgrade To maximize efficiency in your kitchen, it is recommended to frequently organize your kitchen appliances. By doing so, you can significantly reduce the time required for each season. It is advised to conduct this task at least twice a year. For an even more meticulous approach, consider labeling your cabinet doors. This additional step can further enhance the organization and accessibility of your kitchen items. Final Thoughts When it comes to organizing kitchen appliances, it may initially seem like a daunting task. However, the effort put into creating a streamlined and functional kitchen is undoubtedly worth it. By ensuring that each appliance finds its rightful place, even if it means parting ways with that juicer you’ve never used, accessing the toaster oven in the morning or air frying a chicken for a delicious dinner becomes a breeze. This simple yet effective organization system allows for greater efficiency and convenience in your culinary endeavors, making your kitchen experience all the more enjoyable.

How To Arrange Appliances In Your Kitchen? Read More »

How To Clean Your House When You Feel Paralyzed By “The Mess”

How To Clean Your House When You Feel Paralyzed By “The Mess”

We all know the feeling – you look around your house and everything seems to be a mess. Clothes scattered around, dishes piled up, toys and books messing up every corner, and don’t even get me started on the dust bunnies lurking in the corners.  It’s easy to feel stuck in this kind of situation – overwhelmed and paralyzed by the sheer amount of work to be done. So what do you do? How can you get past that feeling and actually clean your house? Here are some tips that can help. 1. Break it down One of the best ways to tackle a messy house is to break it down into smaller, manageable tasks. Start by making a list of what needs to be done in each room, and from there, prioritize based on what needs the most attention. This can be really helpful in giving you a sense of control and accomplishment as you start crossing things off your list.  2. Set a goal  It’s tough to get motivated when you’re feeling down about the mess, but setting a goal can be a great way to shift your mindset. For example, challenge yourself to have the entire living room clean by the end of the day, or make a goal to donate or sell 5 pieces of clothing you no longer need. These small goals can give you something to work towards and keep you motivated.  3. Enlist help  If you’re really feeling overwhelmed, it’s okay to ask for help. Whether it’s a friend, family member, or even hiring a professional cleaning service, having someone else there to lend a hand can make all the difference. Plus, it can be a fun bonding activity and make the task feel less daunting.  4. Take breaks  Cleaning can be draining, both physically and mentally. Remember to take breaks when you need them to recharge. Whether it’s taking a walk outside, reading a book, or watching an episode of your favorite TV show, allowing yourself time to recharge can help you come back to the task with renewed energy.  5. Celebrate your progress  Finally, remember to celebrate your progress along the way. It’s easy to get caught up in the long to-do list, but taking a moment to appreciate how far you’ve come can feel really satisfying. Whether it’s taking a picture of your clean living room or treating yourself to a small indulgence, it’s important to recognize your accomplishments. 6. Start with one room  If you’re not sure where to begin, start with one room. Choose the room that causes the most stress, and tackle it one step at a time. Break the room into sections if needed, such as one shelf of a bookcase or one closet. This approach will help you stay focused and prevent burnout. 7. Be realistic  Yes, you want a clean home. But, it’s important to be realistic about the amount of work involved. Don’t expect to clean your entire house in one day. Instead, choose a realistic time frame for each task and schedule breaks to prevent burnout. Remember, a little progress each day is better than no progress at all. Final Verdict Cleaning can seem overwhelming when the mess is just too much, but breaking it down, setting a goal, enlisting help, taking breaks, and celebrating your progress can make the task feel more manageable. Remember, a little progress each day can add up to big results over time. Don’t let “the mess” paralyze you – take control, and get cleaning!

How To Clean Your House When You Feel Paralyzed By “The Mess” Read More »

Cleaning Hacks That Will Save You Tons Of Time

12 Cleaning Hacks That Will Save You Tons Of Time

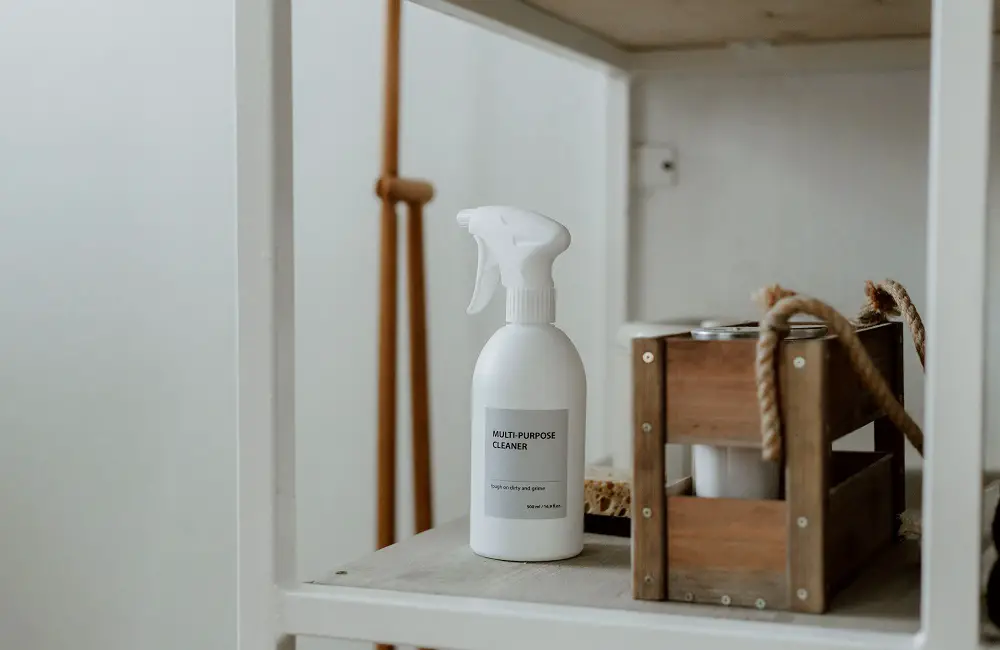
Cleaning is something that is required for every household. Whether it’s cleaning the kitchen, living room, or the entire house, it’s something that we can’t ignore. But let’s be honest, cleaning can be a real pain, and is often a time-consuming chore.  Luckily, there are ways to make cleaning easier and save you time. In this blog post, we’ve rounded up 12 cleaning hacks that you can use to up your cleaning game. 1. Make a cleaning schedule Creating a cleaning schedule is a great way to keep yourself organized. Set aside time to clean up each room in your house, and schedule it in your calendar or planner. By doing this, you’ll be able to break down the tasks and be more productive. 2. Clean as you go Cleaning up after yourself as you go is a great habit to get into. This means putting things back where they belong as soon as you’re done using them. For example, if you’ve cooked dinner, clean up any spills or messes as you prepare the meal. This helps to alleviate the amount of cleaning you need to do after the meal. 3. Use vinegar and baking soda Vinegar and baking soda are two of the most powerful cleaning agents. They’re not only inexpensive but also eco-friendly. They can be used to clean almost everything in your house, including your bathroom and kitchen. For example, use a mixture of baking soda and vinegar in your toilet bowl to remove stains and disinfect. 4. Utilize a dishwasher Your dishwasher can be used for things other than cleaning dishes. For example, it can clean kid’s toys, makeup brushes, and more. Use the gentle cycle to avoid damaging the item, and voila, you have a clean item without any hassle. 5. Have a dedicated cleaning caddy Having a dedicated cleaning caddy makes cleaning more efficient. Instead of having to go back and forth to get cleaning supplies from a different room, keep everything in one location. This way, you can quickly grab the caddy and clean without wasting time searching for supplies. 6. Use a microfiber cloth Microfiber cloths are a great cleaning tool. They’re gentle on surfaces and are great at picking up dust and grime. You can use them to clean windows, counters, and more. They’re also reusable, making them a more environmentally friendly choice. Microfiber cloth like this can remove any stains in your home. 7. Declutter first Before starting to clean, it’s always a good idea to de-clutter. This means throwing out any trash, putting things back in their place, and organizing. This will make cleaning more manageable, and you’ll be able to see the results faster. 8. Invest in a good vacuum Investing in a high-quality vacuum can make cleaning more manageable. A good vacuum can pick up dust and dirt, leaving your floors clean and fresh. It’s worth spending a little extra on a vacuum that will last for years and do the job right. You can try this Amazon Basics Cordless Vacuum. This vacuum can help you with your cleaning problems in your home. 9. Keep a doormat at every entrance Keeping a doormat at every entrance to your home is an easy way to reduce the amount of dirt and dust that gets tracked in. This will reduce the amount of cleaning required, making cleaning easier and faster. 10. Don’t forget about the small stuff Small things like light switches, doorknobs, and handles are often overlooked when cleaning. But these small areas harbor a lot of bacteria. Be sure to clean these areas regularly to maintain a clean and healthy home. 11. Clean baseboards with a broom If you want to skip the inconvenience of getting on your hands and knees while cleaning your baseboards, here’s a helpful tip. Take a microfiber cloth, wrap it around your broom, and secure it with a rubber band. This simple hack not only allows you to clean your baseboards effortlessly but also works great for cleaning your walls. To make the task even easier, spray a suitable dusting cleaner like Pledge onto the cloth. Give this technique a try and enjoy the convenience it offers for maintaining a spotless home. 12. Use coffee filters Coffee filters can be utilized effectively to clean computer screens and TV’s due to their superior performance compared to paper towels or cleaning cloths. Unlike paper towels and cleaning cloths, coffee filters do not leave behind any fibers, ensuring a streak-free and optimal cleaning experience. Give it a try today and experience the remarkable results for yourself. Conclusion Cleaning doesn’t have to be a dreaded task. By using these ten cleaning hacks, you can make cleaning more manageable and save time in the process. With a little organization and effort, you’ll be able to maintain a clean and healthy home without it taking up your entire day. Give them a try and see how easy cleaning can be!

12 Cleaning Hacks That Will Save You Tons Of Time Read More »

How To Clean An Inflatable Pool

How To Clean An Inflatable Pool?

Summer is here, and nothing beats the fun and relaxation of a swimming pool in the comfort of your backyard. If you have an inflatable pool, you know that it can quickly get dirty and require cleaning to keep it in top condition.  Cleaning an inflatable pool may seem like a daunting task, but with the right tools and techniques, it can be a breeze. In this post, we’ll provide a comprehensive guide on how to clean an inflatable pool, so you can enjoy your pool to its fullest.  How Often To Clean An Inflatable Pool  Maintaining the cleanliness of an inflatable pool is crucial to ensure a safe and enjoyable swimming experience. One important aspect to consider is the frequency of water replacement.  According to the Centers for Disease Control and Prevention (CDC), it is recommended to refresh the water in inflatable pools on a daily basis in order to prevent the accumulation of bacteria.  Additionally, regular cleaning of the pool is necessary, with a minimum requirement of once every two weeks. It is important to note that if the pool water appears cloudy or green, it indicates that a cleaning is overdue. Moreover, for larger inflatable pools, chlorine dispensers can be utilized as a means of maintaining cleanliness for a longer period.  However, when it comes to smaller inflatable pools such as kiddie pools, it is advised to avoid mixing chemicals with water. Instead, these pools require cleaning at least every two weeks.  By adhering to these guidelines, the cleanliness and hygiene of your inflatable pool can be effectively maintained. What You’ll Need To properly clean your inflatable pool, you will need the following equipment and materials: By following these steps and utilizing the necessary equipment and materials, you can effectively maintain a clean and sanitary inflatable pool. How To Clean An Inflatable Pool? Drain the Pool To ensure a thorough cleaning of an inflatable pool, it is imperative to remove all of the water. Begin by completely draining the pool until it is completely empty. This step is crucial to ensure all debris and dirt are effectively removed, resulting in a pristine and hygienic pool. Wash the Pool Liner Using Soap and Water To clean the liner, start by filling a bucket with warm water. Add a few drops of dish soap to create a soapy solution. Take a soft sponge or microfiber cloth and lightly scrub the liner using the soapy water. It is important to be gentle and avoid applying too much pressure to prevent tearing the liner.  Pay close attention to cleaning between any cracks and addressing the water line, as these areas are prone to mildew growth. Taking these steps will ensure thorough and effective cleaning of the liner. Rinse and Dry the Pool Liner After completing the washing process, it is recommended to thoroughly rinse the pool using a hose to efficiently remove any remnants of soap. Subsequently, proceed to drain the water from the pool and meticulously wipe down the inner surface with a clean towel until the pool liner is completely dry. Pay extra attention to drying in between cracks and crevices to ensure proper maintenance and longevity. Use Bleach or a Disinfectant Solution To effectively eliminate tough grime, grease, and bacteria from bodily fluids, you can utilize bleach or another chemical disinfectant solution. For a homemade solution, combine 1/4 cup of household bleach with 32 oz of water in a spray bottle.  Proceed by spraying the solution onto the pool liner surface, allowing it to sit for approximately 5 minutes to ensure thorough disinfection. Finally, rinse the surface with water from a hose. This process guarantees proper cleansing and sanitation. Rinse and Dry the Pool Again The pool cleaning process involves several important steps. Firstly, after using a chemical solution to clean the pool, it is necessary to thoroughly rinse the pool using a hose. This will ensure that all residue from the cleaning products is completely removed.  To further guarantee the removal of any remaining cleaning solution, multiple rounds of rinsing should be performed. Once the rinsing process is complete, it is important to drain any remaining water from the pool.  To prevent the formation of mildew, it is recommended to wipe down the inside of the pool using a dry and clean towel. By following these steps, you can effectively maintain the cleanliness and hygiene of your pool. Refill With Fresh Water After thoroughly drying the pool, it is recommended to replenish it with fresh water using a hose. To ensure optimal cleanliness and safety, cover the inflated and filled pool with a suitable cover until it is ready for future use. 5 Tips To Keep An Inflatable Pool Clean Longer Keep debris out of the pool  One of the easiest ways to keep your inflatable pool clean is to prevent it from getting dirty in the first place. If possible, set up your pool in a shaded area to avoid leaves, twigs, and other debris from falling into the water. You can also use a pool cover or tarp to keep the pool protected when not in use. If you notice any debris in the pool, use a skimmer or net to remove it as soon as possible. Use the right chemicals  While an inflatable pool may not require as many chemicals as a larger, permanent pool, you still need to use the appropriate ones to keep the water safe and clear. Chlorine is commonly used to disinfect and sanitize pool water, but you can also use other alternatives such as bromine or mineral purifiers. Follow the instructions on the label for the right amount of chemicals to use, and make sure to test the water regularly to keep the levels balanced. Clean the filter regularly  Most inflatable pools have a built-in pump and filter system that helps keep the water clean and circulating. It’s important to clean the filter regularly to prevent it from clogging and reduce the workload on the pump. Check the

How To Clean An Inflatable Pool? Read More »

How to Get Rid Of Termites In Your Home

How to Get Rid Of Termites In Your Home?

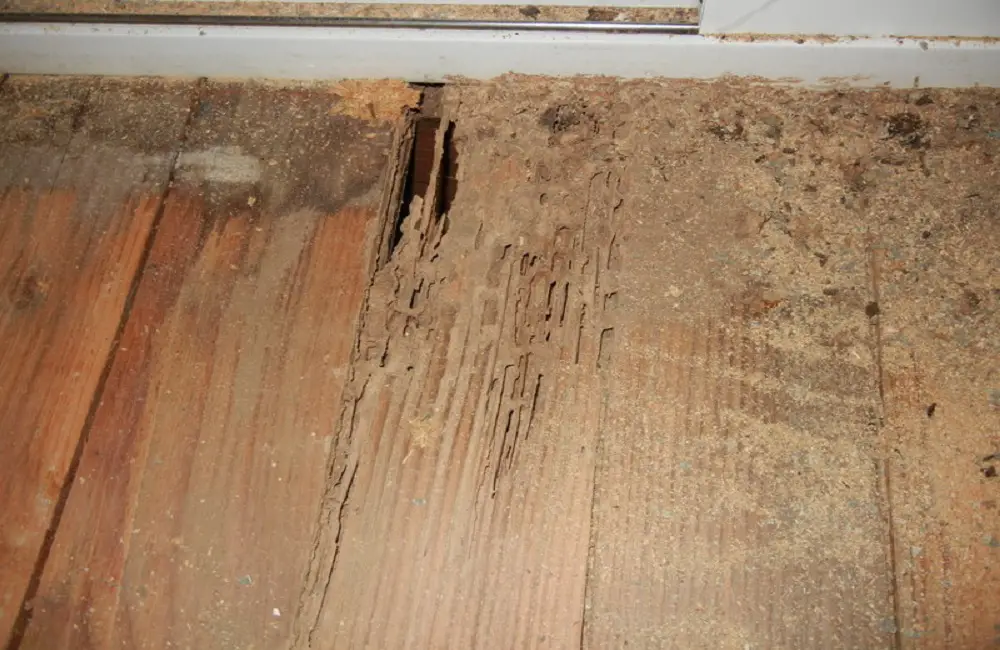
Termites are a homeowner’s nightmare. These tiny pests can cause severe damage to your home’s foundation, and if not detected early enough, can lead to costly repairs. Therefore, prevention and early detection are key to keeping your home termite-free.  In this blog, we will guide you on how to get rid of termites in your home and provide solutions to ensure they do not return. Why Are There Termites In Your Home? Termites have a reputation for being silent destroyers because they can cause significant damage to a structure without any visible signs of trouble. But how did they get into your home in the first place? There are several reasons why termites are attracted to our homes and can infest them. Firstly, one of the reasons why termites are drawn to our homes is warmth. During the cold winter months, termites seek ways to escape the chill, and our cozy homes are great places to do so. As a result, they might build mud tubes or mud shelter tubes that connect the ground to your home to get inside. Secondly, termites thrive in damp and moist environments. Therefore, if your home has moisture buildup from leaks or condensation, it is a prime target for these pesky creatures. That’s why it’s essential always to repair leaks as soon as possible and avoid excess moisture in your home. Thirdly, if you have wooden structures or furniture in your home, termites are more likely to make an appearance. Termites feast on wood because it provides them with necessary cellulose components of their diet, so if you have pieces of wood in your home, you’re creating an open invitation to termites. Fourthly, termites might come inside if there were other types of pests around that carry them in. Ants, for example, can carry termites into your home. That’s why it’s essential to ensure that your home has no other pests that might be bringing termites with them. Lastly, proximity to other infested areas, whether it’s your neighbor’s garden or other infected trees or wood, increases the chance of termites making their way into your home. How To Get Rid Of Termites In Your Home? Identify the Source Identifying the source of the termites is crucial in getting rid of them. Termites can come from different areas within your property, whether it’s from the soil, pipes, or other areas in your home. When you identify the source of the termites, you can then apply the correct treatment to get rid of them. You can hire a professional exterminator to help you determine the source if you are unsure. Use Termite Treatments There are various termite treatments available on the market, and each has its advantages. Some treatments include bait stations, liquid termiticides, and wood treatments. However, before using any of these treatments, ensure you read the instructions carefully and apply them correctly. Applying the treatments incorrectly can lead to ineffective results or pose a health hazard to you and your family. Hire a Professional Exterminator If you are unsure of how to get rid of termites or have tried several DIY methods without success, consider hiring a professional exterminator. Exterminators have the necessary tools, experience, and products to eliminate termites effectively. Additionally, exterminators also provide preventative measures to ensure the termites do not return and cause further damage to your home. Prevent Future Termite Infestations Prevention is better than cure. Once you get rid of termites from your home, ensure you take preventative measures to avoid a future infestation. Some preventative measures include regularly inspecting your home for termite activity, eliminating wood-to-soil contact, ensuring proper drainage, and using treated wood to build structures. Doing so will ensure that termites do not return to your home. Call for Regular Termite Inspections Regular termite inspections can help identify any termite activity before they cause severe damage to your home. A professional exterminator can conduct a termite inspection and provide preventative measures that will keep your home termite-free for years. A yearly inspection is recommended to ensure your home stays safe from these pesky critters. Final Words Termites can cause severe damage to your home if not detected and dealt with early. Therefore, take preventative measures to ensure your home is termite-free. If you notice any termite activity in your home, identify the source, use termite treatments, and hire a professional exterminator if necessary.  Preventative measures, such as regular inspections, can ensure your home remains termite-free for years to come. With these solutions, you can bid farewell to termites and enjoy your home pest-free.

How to Get Rid Of Termites In Your Home? Read More »

Dirtiest Places in Your Kitchen

8 Dirtiest Places in Your Kitchen

The kitchen, a space highly regarded as the central hub of the home, serves as both a nourishing sanctuary and a creative hub for culinary enthusiasts. However, amidst the comforting familiarity of this bustling haven, lie inconspicuous hotspots that harbor hidden dirt and germs.  In this enlightening exposé, we aim to shed light on the eight most notorious areas in your kitchen that are often overlooked and unsuspectingly become breeding grounds for harmful bacteria.  We strongly encourage you to delve deeper into these under-recognized culprits and to promptly address the potential health risks they pose—a paramount task in maintaining a clean and hygienic kitchen environment. 8 Dirtiest Places in Your Kitchen Behind and Beneath Appliances It is important to maintain cleanliness not only on the surfaces of kitchen appliances, but also in the often overlooked areas behind and beneath them. Over time, refrigerators, ovens, and dishwashers can accumulate layers of grime, creating an ideal breeding ground for germs.  To prevent the buildup of dirt in these hidden spots, it is recommended to periodically pull out these appliances and thoroughly clean the surrounding areas. By doing this, you can ensure a hygienic environment in your kitchen and minimize the risk of contamination. Under the Sink The space under the kitchen sink is a commonly crowded area that houses cleaning supplies and dishwashing essentials. Unfortunately, this space is also prone to mold and mildew growth due to factors such as leaky pipes or residual water from cleaning activities.  The accumulation of moisture creates a damp environment that provides optimal conditions for these unwelcome invaders.  To maintain a healthier kitchen environment, it is essential to periodically declutter and thoroughly clean the under-sink area, thereby preventing mold growth and ensuring cleanliness. Trash Can and Bin Area Regularly disinfecting the trash can and cleaning the bin area are crucial steps in maintaining cleanliness and hygiene. In addition, using liners provides an extra layer of protection against germs and helps prevent foul odors.  Neglecting to address these areas in regular cleaning routines can result in the buildup of food residues, liquids, and general waste, creating an environment conducive to bacterial growth.  By incorporating these simple practices into your cleaning routine, you can effectively combat germs and keep unpleasant smells at bay, ensuring a clean and sanitary space. Cabinet Handles and Knobs Regularly cleaning cabinet handles and knobs is crucial for maintaining a clean and germ-free kitchen. These frequently touched areas can accumulate a surprising amount of dirt and bacteria due to the combination of natural oils from hands and residue from the kitchen.  To prevent the spread of germs, it is recommended to wipe down cabinet handles and knobs with a disinfectant on a regular basis. By taking these additional steps to keep your kitchen clean, you can ensure a healthier and more hygienic environment. Light Switches Light switches are an essential component in every room that should not be overlooked during routine cleaning. Due to frequent hand contact, light switches can become reservoirs for germs, posing a potential health risk.  To maintain a more sanitary kitchen environment, it is crucial to incorporate these frequently touched surfaces into your regular cleaning routine. Consider using disinfectant wipes to effectively eliminate germs and maintain cleanliness. Dish Drying Rack It is important to pay attention not only to cleaning our dishes but also to the dish drying rack, which can often be overlooked as a potential source of germs. When we leave moisture behind on the rack, it can lead to the growth of mold, which can then transfer onto our freshly washed dishes.  To prevent this, it is recommended to regularly clean and thoroughly dry the dish rack, ensuring the removal of any moisture and preventing the buildup of mold. By doing so, we can maintain the cleanliness and safety of our kitchenware. Reusable Grocery Bags Reusable grocery bags, although praised for being eco-friendly, can actually harbor hidden germs. This is because these bags come into contact with a wide range of surfaces, such as shopping carts and kitchen counters, leading to the accumulation of bacteria.  To prevent potential sources of contamination in your kitchen, it is important to regularly launder or wipe down these reusable bags. By doing so, you can effectively eliminate any harmful bacteria and ensure a hygienic environment for your food preparation. Pet Feeding Area In households with furry companions, it is important to recognize that the pet feeding area may serve as an unexpected breeding ground for bacteria. If not cleaned regularly, pet bowls can accumulate food residues and become a haven for germs.  To safeguard the health and well-being of both your pets and your family, it is recommended to incorporate the cleaning of pet bowls into your routine for maintaining a hygienic kitchen environment.  By implementing this simple yet vital step, you can ensure the optimal care and safety of your beloved pets. Final Thoughts As we explore the vast culinary landscape of our kitchens, it becomes crucial to be ever-vigilant of the concealed nooks and crannies that may unwittingly harbor dirt and germs.  In order to promote a cleaner and healthier kitchen environment, let us address eight commonly overlooked areas.  By doing so, we can guarantee that the heart of your home remains an impeccably safe and inviting space, ensuring the well-being of all who enter its hallowed confines.

8 Dirtiest Places in Your Kitchen Read More »

Scroll to Top