https://pagead2.googlesyndication.com/pagead/js/adsbygoogle.js?client=ca-pub-9463394879326171 crossorigin="anonymous">

Bathroom

Bathroom Paint Color Ideas

20 Bathroom Paint Color Ideas & Wall Projects You Will Love To Copy

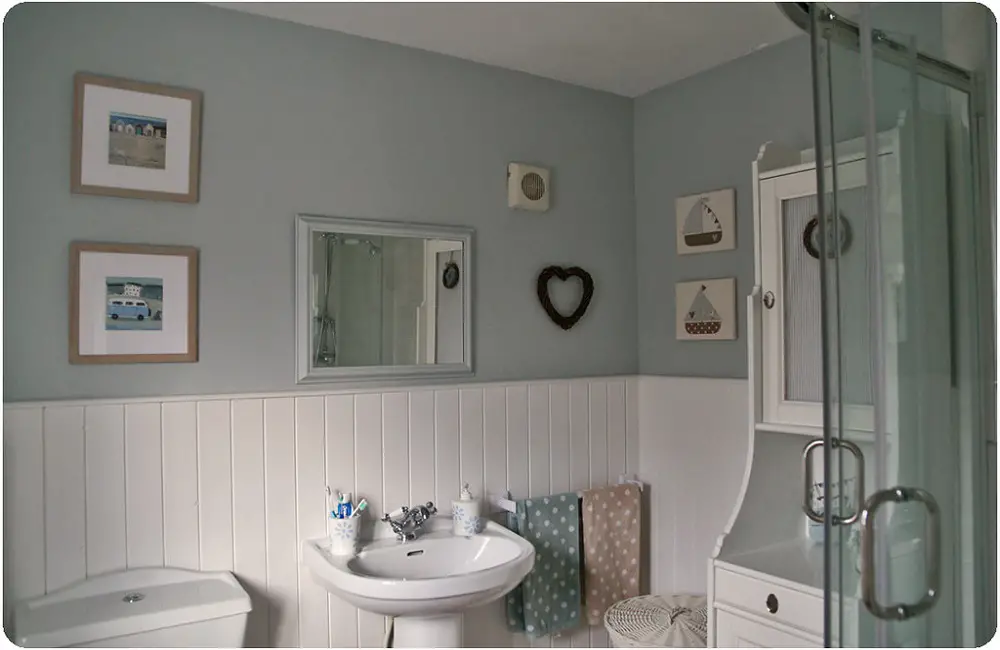
Any home must have a bathroom that expresses its own design and fosters a tranquil atmosphere. Selecting the appropriate paint color and wall projects may make a big impact, whether your goal is to create a calm, spa-like refuge, a colorful, lively room, or a minimalist haven. Finding the right color scheme for you It can be difficult to come up with the ideal concept that fits your aesthetic, especially if you’re not sure which way you want to go. To help you find the perfect paint job or accent item to finish the space, we’ve put up a list of some possibilities. Elevating the decor You may now move on to the more thrilling phase, which is the decorating process, now that you have decided the colors you want to emphasize. We’ve listed a few necessities you may utilize to give your bathroom a makeover, from maximalists prospering in their hectic settings to minimalist places. 1. Split paint You may achieve this split paint idea on the walls by just adding a piece of wood. The basic gray-and-white design helps give your bathroom a refined appearance. This is a great quick remedy for the bathroom, which is something we often overlook while making improvements to our homes. 2. A statement wall with light wood additions A bold wall can make a big impression. You can design the bathroom of your dreams with wallpaper, which is easily replaceable. To lighten the area, add some mood lighting, gold accents, and light wooden shelves. Additionally, you may add a few tiny accent pieces, such woven baskets, plants, and artwork. 3. Moody greens Before you judge this concept, give it a try. Although most of you think of bathrooms as being light and airy, a new bathroom remodel might look great with a moodier aesthetic. Simple white accents look fantastic with dark green. To contrast with the darker tones, you can also use some lighter green hues. 4. Gold, white and dark colors You can use whichever color scheme you want if your bathroom has tiles and gold fittings. If you want something a little more subdued to counterbalance the vibrant colors, maroon or terracotta work wonderfully. For an extra special touch, you can add some wooden décor items and flowers. 5. Classic white with a simple accent wall Keep it simple and use black and white. Use wall art, quotations, or an accent wall made of wallpaper to provide a whimsical finishing touch to the space. Another way to stick to the color concept is to use gray rugs or paint the planters black. 6. Mood lighting and floating shelves Use quotes, floating shelves, painted mason jars filled with flowers, and extra plants to give your place a farmhouse feel. It’s a really lovely concept that gives any space a customized feel. In order to enhance the space, mood lighting is another option. 7. Light blue walls and greenery The usage of blues in a space will instantly calm you down and give it a bright appearance. For a lovely, natural aesthetic, you can add some floating shelves with pictures and plants on them. It looks good with accents made of light wood. 8. Bring in accent wallpaper If your area is small, you might utilize an accent wall to give the impression that it is larger. If space is a concern, you can install floating shelves to avoid taking up too much floor space. Just include what is absolutely necessary to avoid feeling as though you are wasting space. 9. The minimalist Oasis Maintain a natural flow. The bathroom appears more natural thanks to the oasis aesthetic. An abundance of plants and golden accents combine with light wood decor elements to create a cheery and vibrant atmosphere. If done well, it’s a straightforward aesthetic that makes a big impression. 10. Forest green and gold accents While forest green may not be to everyone’s taste, it does inspire beautiful and imaginative bathroom ideas. To make sure the somber hue doesn’t appear overly dramatic, combine it with gold and light wood elements. To make sure the space continues to receive adequate lighting, replace the mirror and add more lights. 11. Paint and wallpaper split A few floating shelves are used in this split wall concept to divide the color themes. The ideal accent wall is made by applying wallpaper to the top portion of the wall and using a dark color underneath. It’s ideal for a small bathroom since the shelves let you utilize less floor space. 12. Sage green and wall art You can achieve the illusion of a larger bathroom by adding the wood panels on the bottom. To make things bolder, paint the walls a sage green color and add some golden accents, like on the mirrors, or even add some light wood frames for the wall art. 13. Gold, green, and white You can always go with this straightforward option if you can afford to DIY an accent wall. To create a zigzag pattern, you can paint black stripes on the walls that are light grey or even white. For a distinctive touch, add some foliage and golden accents. 14. Dusty pink and copper Dusty rose and marble combine to produce a sophisticated and cozy look. Though this concept isn’t particularly well-liked, it will undoubtedly spark an original thought. Along with adorable décor items, you can use some copper elements like candle holders and mirrors. To counterbalance the colors, add some pink and white accessories. 15. Floating shelves and wall art This shade of sage green looks fantastic with some dark accents. You may fill up more room with easy additions like floating shelves, art pieces, and towel hooks. This concept creates a balanced appearance of light and dark. 16. Dark green and mood lighting Dark green and wood paneling are combined in this design to create the ideal balance for this straightforward bathroom concept. You can add some golden artwork and perhaps some illumination made of Edison

20 Bathroom Paint Color Ideas & Wall Projects You Will Love To Copy Read More »

Best Paint Colors For Small Bathrooms Without Windows

7 Best Paint Colors For Small Bathrooms Without Windows

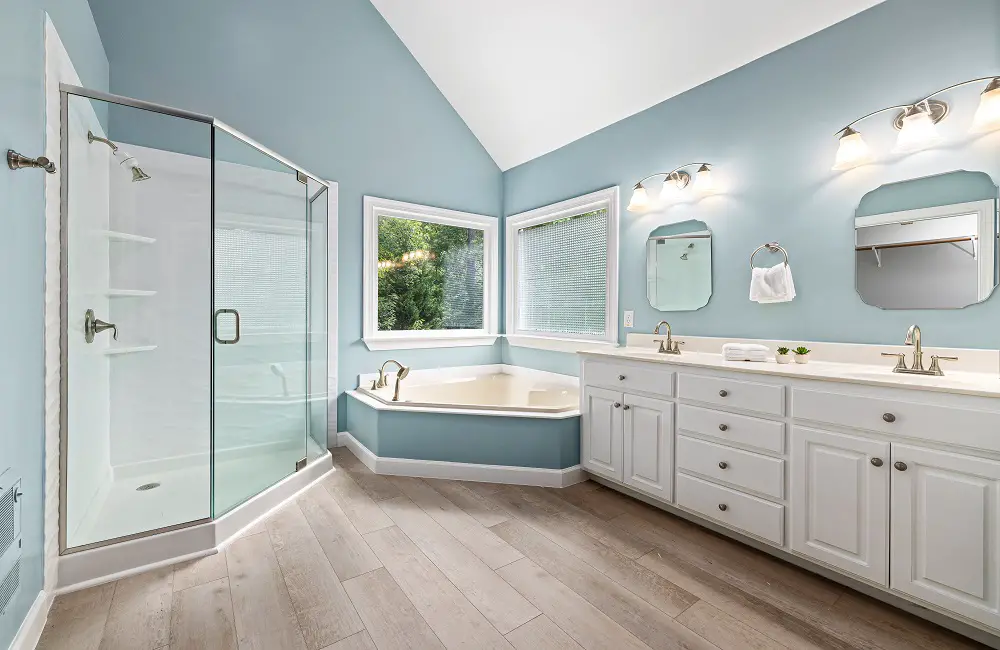
Selecting the right paint colors for a small windowless bathroom can significantly enhance its appearance. If you have a compact, dimly lit bathroom, such as a powder room under the stairs, it’s crucial to choose colors that create an illusion of spaciousness, brightness, and airiness. So what are the best paint colors for a small bathroom without windows? Light and bright colors are highly recommended as they help reflect light. Options like white, neutrals, soft gray or blue, yellow, and blush pink can not only create tranquility but also give an impression of a larger space. For a touch of sophistication, you can consider combining glossy dark colors with lighter shades. Decorating a small, windowless bathroom with no access to natural light might present challenges, but the available paint options can pleasantly surprise you. With the right choice of paint, even the darkest and pokiest bathroom can be transformed into a radiant and attractive space. If you’re interested, let’s delve into the world of colors to explore the best paint options for your small bathroom. Choosing Paint Colors for a Small, Windowless Bathroom When facing the challenge of decorating a small, windowless bathroom, it’s important to consider several criteria that can help guide you in selecting the best paint colors. To facilitate the decision-making process, ask yourself the following relevant questions: What are the Lighting Options in the Bathroom? To ensure proper lighting in bathrooms, it is crucial to consider personal grooming activities that take place in these spaces. The amount of available natural light significantly influences your choice of paint color, as it affects how light is reflected and enhanced. In windowless rooms where natural light is limited to what filters through the open door, it becomes necessary to evaluate the artificial light sources present. Key considerations include: Addressing these factors thoughtfully will contribute to creating a well-lit and comfortable bathroom environment. What Mood Do You Want to Create? When choosing a paint color for your bathroom, it is important to consider the desired vibe or mood you want to create. For instance, if you are looking for a spa-like retreat that exudes serenity and meditation, you may opt for calming shades.  On the other hand, if you enjoy spending long hours in the bath by candlelight, you might prefer a darker color scheme. If the bathroom is meant to accommodate the whole family, it should be functional and friendly, with colors that promote a welcoming atmosphere. Alternatively, if you have a penchant for artistic expression, you can explore patterns and bolder hues to let your creative side shine.  Additionally, it may be worth considering whether the bathroom’s design should align with an existing color palette in the rest of your home. Taking all these factors into account will help you make an informed decision in selecting the perfect paint color for your bathroom. How Does the Paint Look in the Room? When selecting a paint color, it is crucial to consider testing it in the actual room being painted and under the available lighting sources. Keep in mind that the color perception might differ between a well-lit hardware store and a poorly lit bathroom. Taking these aspects into account will ensure a more accurate representation and help you make an informed decision. Best Paint Colors for Small Bathrooms Without Windows 1. White  It’s no surprise that white is the go-to color for small bathrooms without windows. White is light and airy, making it an excellent choice to brighten up the room. It reflects light, making the room appear bigger and brighter. 2. Light Gray  If you want something other than white, then light gray is a great option. It’s still light enough to brighten up the room, but it adds a touch of sophistication to the space. Light gray is a great choice if you want something neutral, but not too stark. 3. Pale Blue  Pale blue is a calming and soothing color that’s perfect for a small bathroom. It’s light enough to open up the room, but it adds a touch of color to make it feel less clinical. Pale blue is a great choice if you want a relaxing and spa-like atmosphere. 4. Soft Green  Soft green is another calming color that’s perfect for a small bathroom. It’s light enough to open up the space, but it adds a touch of color to liven up the room. Soft green is a great choice if you want a natural and serene atmosphere. 5. Sunny Yellow  If you want to add a burst of energy to your small bathroom, then sunny yellow is the way to go. Yellow is a warm and inviting color that’s perfect for a small space. It reflects light and adds a touch of brightness to the room. 6. Light Pink  Light pink is a soft and feminine color that’s perfect for a small bathroom. It’s light enough to brighten up the room, but it adds a touch of color to make it feel less clinical. Light pink is a great choice if you want a soft and romantic atmosphere. 7. Cream  Cream is a warm and comforting color that’s perfect for a small bathroom. It’s light enough to open up the space, but it adds a touch of warmth to the room. Cream is a great choice if you want a cozy and inviting atmosphere. Final Thoughts Choosing the right paint color for a small bathroom without windows can feel overwhelming. But with these 7 options, you can create a space that’s bright, inviting, and tailored to your taste. Remember, the right color has the power to open up a room and transform it into a warm and welcoming space.  Whether you choose white, light gray, or sunny yellow, the color you choose will influence the mood and atmosphere of your bathroom. So take your time, try out samples, and choose the color that’s right for you.

7 Best Paint Colors For Small Bathrooms Without Windows Read More »

Small Bathroom Organization Hacks

5 Small Bathroom Organization Hacks

The bathroom, being one of the smallest and frequently cluttered rooms in a home, poses challenges in maintaining tidiness and order. This disarray not only presents an unsightly appearance but also hampers efficiency in daily tasks such as preparing for work or other events, resulting in wasted time searching for misplaced items or rearranging belongings.  Consequently, it becomes essential to declutter the bathroom before embarking on organization efforts, as this simplifies the task at hand and ensures smoother efficacy. To aid in streamlining the organizing process, we present a collection of highly effective bathroom organization hacks.  These hacks offer practical solutions to achieve a well-organized bathroom promptly and with budget-friendly approaches that may exceed your expectations. 5 Simple Ideas for Organizing Your Small Bathroom There are several effective methods available to maximize bathroom storage space at minimal cost. Here, I will share a few practical ideas that you can consider implementing in your own bathroom. By following these suggestions, you can efficiently organize your bathroom essentials and optimize the available storage area, resulting in a more functional and clutter-free space. Over the Toilet Storage When it comes to optimizing bathroom space, the area above your toilet is often overlooked. However, there are numerous storage solutions that not only maximize functionality but also enhance the overall appearance of your bathroom. One option is to choose from a variety of prebuilt storage units available in the market. These units typically offer two or three shelves, along with a small cabinet, providing ample storage for items such as towels, toilet paper rolls, shampoos, soaps, and more. Please note that some units have legs that fit closely next to the toilet tank, which may pose challenges during cleaning. If you prefer a more customized approach, you can construct your own shelves or purchase pre-cut shelves and shelf brackets. By doing so, you can eliminate the need for legs, ensuring a clean and seamless design.  Another affordable and aesthetically pleasing alternative is to buy towel racks and wicker baskets. Attach the baskets to the towel rack using ribbon or S hooks, allowing for the installation of multiple baskets above the toilet.  These baskets serve as ideal storage solutions for items such as towels, toilet paper, hair dryers, shampoo, conditioner, and body wash. Alternatively, you can directly attach wicker baskets to the wall, eliminating the need for towel racks. This option provides a simple yet effective storage solution. For items that you prefer to keep hidden until needed, consider building a recessed storage space within the bathroom wall.  By utilizing the space between studs, which is typically around 16 inches, you can create a discreet storage compartment for concealment of items like plungers, toilet bowl brushes, and cleaners. This hidden storage area can blend seamlessly with the surroundings, remaining unnoticed unless you know where to look. With these creative storage ideas, you can make the most of the space above your toilet while optimizing organization and adding a touch of functional elegance to your bathroom. Simple and Easy Bathtub or Shower Storage Having ample storage space in your bathtub or shower is crucial for maintaining functionality and organization in your bathroom. There are several effective methods for increasing storage capacity in your shower or tub. One option is to utilize corner shower shelving or an over-the-shower-head shower caddy. These solutions provide small shelves where you can conveniently place items such as soap, shampoo bottles, and other shower essentials. If you require additional bath or shower storage beyond what these caddies offer, you can consider creating your own storage setup. One approach is to install an extra shower curtain rod and attach a few mesh fruit bags and plastic baskets to it. The mesh bags are ideal for storing kids’ bath toys, as well as loofahs and other accessories.  The baskets can hold items like shampoo, conditioner, soap, and any other necessary products. The versatility of this setup allows you to adjust the rod’s height to accommodate either your shower or tub. By implementing these storage solutions, you can enhance the functionality and organization of your bathroom, ensuring that everything you need is within reach while keeping clutter at bay. Turn the Back of Your Bathroom Door into Extra Storage One way to maximize storage space in your bathroom is by utilizing the back of the bathroom door. Depending on your specific needs, there are various options to consider. Firstly, if you’re looking for a convenient place to hang your bathrobe or pajamas while you bathe or shower, installing a small coat rack or hooks on the bathroom door can be highly beneficial. This allows you to keep your bathrobe easily accessible yet out of the way. Additionally, using an over-the-door shoe caddy with clear pockets can offer an abundance of storage for various bathroom essentials. From hair brushes and combs to curling irons, shampoos, soaps, toothbrushes, and even makeup, the shoe organizer provides ample space to keep everything tidy and easily accessible. Furthermore, if you require extra towel storage, there are a couple of options. You can either utilize towel holders to hang or store additional towels, or repurpose an old wine rack by rolling your towels and placing them in the rack. When considering which option to implement, it’s important to take into account the amount of existing storage space available and determine your specific storage needs. By capitalizing on the back of your bathroom door, you not only optimize storage capacity but also keep your bathroom organized and clutter-free. Making the Most Use Out of Your Sink Cabinet When it comes to maximizing the functionality of your sink cabinet, there are several effective methods that you can consider. Let’s explore a few examples: Apart from the sink cabinet’s interior, don’t forget to utilize the door as well. Here’s a great tip: attach a couple of PVC pipes to the inside of the cabinet door to conveniently hold your curling iron and brush. Additionally, make use of an over-the-door towel holder on the outside

5 Small Bathroom Organization Hacks Read More »

How To Steam Clean Bathroom Grout

How To Steam Clean Bathroom Grout?

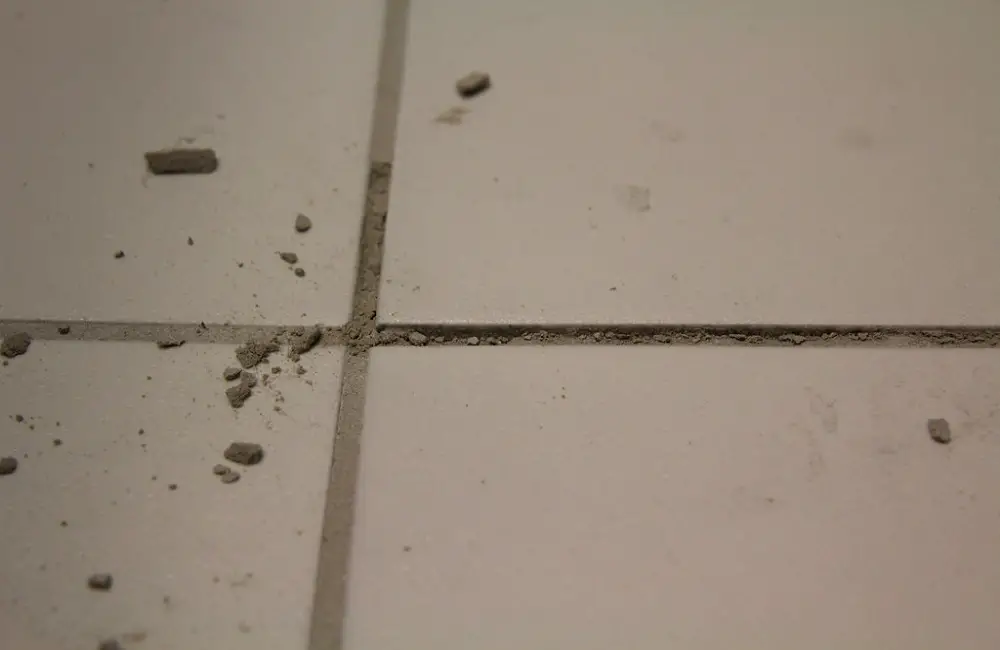
If you’re looking to achieve a clean and fresh-smelling bathroom, learning how to steam clean bathroom grout is essential. Dirty grout can make your floors and tile walls appear dirty, regardless of how recently they were cleaned. Moreover, grout has the tendency to absorb odors such as urine in the bathroom, making it even more crucial to clean it regularly. Cleaning grout can be a labor-intensive task that can work your arm muscles. However, with the appropriate tools at hand, you can efficiently and quickly clean grout without the need for excessive scrubbing. The steam cleaner is the ideal tool to use for cleaning dingy tile grout. By incorporating steam cleaning into your bathroom cleaning routine, you can effortlessly achieve a well-maintained and pleasant-smelling bathroom. Can You Steam Clean Bathroom Grout? Steam cleaning bathroom tile grout can be a highly effective method for achieving cleaner and fresher-looking tile floors and walls. Unlike other cleaning methods that require considerable physical effort and time, steam cleaning offers a quick and efficient way to get the job done. Many individuals are pleasantly surprised by the results of steam cleaning their bathroom tile grout. Not only does it provide a deep and thorough clean, but it often reveals a different color of grout than previously anticipated. Incorporating steam cleaning into your regular cleaning routine can help maintain the best possible condition of your tile grout. With its ease of use and proven effectiveness, steam cleaning is a convenient choice for achieving optimal cleanliness in your bathroom. What Kind of Steamer is Best for Bathroom Grout? For the regular maintenance of your tile grout, it is highly recommended to invest in a steam mop. This investment will provide you with the convenience of effortlessly steaming your entire bathroom floor.  In the event that you do not have a steam mop, you can still achieve amazing results by utilizing a handheld steam cleaner.  Although it may require a bit more patience, using a small head attachment for your steam cleaner will enable you to focus the steaming power precisely on your tile grout lines. This targeted approach ensures thorough cleaning and upkeep. How to Steam Clean Tile Grout in Bathroom Floors To ensure optimal cleaning of your bathroom tile grout, it is recommended to follow a proper preparation process. Before using a steam mop, it is advisable to clean the floor separately for more effective results. By cleaning the floor first, you create a suitable environment for the steam mop to efficiently tackle the tile grout, resulting in a thorough and satisfactory cleaning experience. Sweep the Bathroom Floor To effectively clean bathroom grout lines, begin by using a stiff broom. Pay close attention to the grout lines and make sure they are free of any loose debris. Additionally, carefully inspect for any embedded dirt or other items that might be present.  If you come across any chunks of dirt or other materials, make sure to remove them diligently. Follow these steps meticulously to ensure a thorough and satisfactory cleaning of the bathroom grout lines. Mop the Floor For optimum hygiene, it is recommended to thoroughly clean your bathroom floor by quickly mopping it. This simple action effectively eliminates any excess dirt or grime, ensuring a clean and fresh environment. First Run To achieve optimal results, it is recommended to perform multiple passes with a steam cleaner when cleaning your bathroom tile grout. During the first pass, move the steam cleaner slowly along the lines of the grout, ensuring thorough coverage and effective cleaning. It is important to follow this methodical approach to ensure a well-done and satisfactory outcome. Wipe Up Dirt with a Clean Towel It is recommended to carefully follow behind with a clean towel immediately after removing any dirt to prevent it from drying back onto the surface. This subsequent wiping can help maintain the cleanliness and prevent the grout from appearing blotchy or uneven. Please note that this occurrence is completely normal, as dirt may not adhere evenly to the grout in your home. Treat with Peroxide After completing the initial pass, it is advisable to apply peroxide to the areas where dirt remains or where steaming was ineffective. Allow it to sit for approximately 5 minutes before reinitiating the steaming process. This additional step will help ensure a thorough cleaning of the targeted areas. Second Run To effectively clean the grout lines, it is recommended to follow along while pausing intermittently. This allows the steam to work its magic in areas that require treatment, effectively eliminating dirt and grime. Allowing the steam to seep into the dirt is a highly effective method for breaking up even the most stubborn, set-in stains. Repeat Peroxide Treatment if Needed To continue, perform the cleaning process once more using a fresh cloth. If necessary, repeat the peroxide treatment and steam treatment. This comprehensive approach ensures thorough cleaning and optimal results. How to Steam Clean Tile Grout in Shower Walls Clean the Walls Before you start, it is important to clean the shower wall thoroughly. Soap scum tends to accumulate and can trap dust and dirt in the shower grout, ultimately causing it to appear dull and unclean. Taking the time to clean the shower wall will ensure a pristine and impeccable look. Steam Clean the Walls To effectively clean the shower tile grout, follow these steps. Begin by ensuring that your shower walls are clean. Once done, start steaming the grout from the top, moving downward along the grout lines.  This technique allows the melted soap scum and grime to flow down the shower walls and be rinsed away as you progress downward. By incorporating this method into your cleaning routine, you can achieve a thoroughly cleansed and revitalized shower space. Rinse Well To effectively prevent grime from drying back onto your tiles, it is recommended that you rinse your shower walls thoroughly and frequently as you work your way across them. By doing so, you can maintain the cleanliness and pristine condition of your

How To Steam Clean Bathroom Grout? Read More »

Ways To Make Your Bathroom Feel Like A Spa

10 Ways To Make Your Bathroom Feel Like A Spa

An indulgent spa experience can work wonders for your mind and body. The calm, serene atmosphere and the luxurious treatments are simply irresistible. However, a spa session may not always fit into your busy schedule or budget.  But don’t worry, you can easily recreate that luxurious spa experience at home! In this blog post, we’ll give you 10 simple yet effective ways to transform your bathroom into a relaxing sanctuary. So, sit back, relax, and get ready to pamper yourself! Use Candles or Diffusers The addition of a high-quality beeswax or clean-burning soy candle can greatly enhance the luxuriousness of even the most lackluster bathrooms. Candlelight, known for its soothing and forgiving nature, offers a unique and relaxing ambiance when compared to harsh overhead lighting. Transform your space instantly by lighting a few of these candles and dimming the overhead lights.  Moreover, if you haven’t already embraced the benefits of diffusers, they provide an excellent way to infuse your home with delightful scents without any exposure to toxic chemicals. In recent years, diffuser technology has advanced significantly, and you can even find options that emulate the flickering effect of a traditional candle.  As an alternative, we personally enjoy using a compact diffuser that we conveniently move between the bathroom and bedroom to create a delightful aromatic environment. Add An Expandable Bathtub Tray Investing in a small addition to your bathroom, such as an expandable tub tray, is a highly recommended strategy for creating an inviting and enjoyable atmosphere. By simply adding a scented candle and a captivating book, you can effortlessly set the tone for a tranquil and rejuvenating hour of self-indulgence.  As a side note, it is worth mentioning that I personally favor using my Kindle e-reader over a traditional paper copy of a book, primarily due to its water-resistant features. Add Fresh Eucalyptus In my personal experience, I recently discovered a new practice that I found quite intriguing. Last fall, I decided to experiment with attaching several stems of eucalyptus to our shower head, and I must admit, it quickly became a habit. From my perspective, incorporating fresh eucalyptus into a steaming shower is the epitome of indulgence; nothing else can compare to the delightful and invigorating scent it emits. Living in the Pacific Northwest region, my go-to destination for purchasing affordable bunches of eucalyptus or other types of greens is Trader Joe’s. For just a few dollars, I am instantly rewarded with a heightened shower experience each time I step in. Moreover, if you possess a certain level of ambition, once the eucalyptus stems dry out, they can be repurposed to create fragrant sachets for clothing drawers or closets. Freshen Up With A Cute Shower Curtain To achieve significant impact at a low cost, consider utilizing a shower curtain as a practical solution. When selecting a shower curtain for your guest bath, you have the freedom to choose from a wide variety of options.  For instance, a colorful botanical shower curtain can add a vibrant touch, while a soothing neutral curtain may provide a more calming ambiance. Ultimately, it is crucial to remember that a shower curtain (or even alternative options such as paint or other elements) can be an opportunity for exploration and experimentation. Embrace the chance to step outside your comfort zone and discover new possibilities for enhancing your home’s style and aesthetic. Add Plants I have been emphasizing the benefits of incorporating plants into bathroom decor lately, and I can’t stress enough how well they complement this space. Hanging plants, in particular, have captured my heart. It’s surprising that I didn’t embrace the “plant lady” trend sooner, but now I’m fully on board! Plants, such as Pathos and ferns, thrive in different areas of our home, but they truly shine in bathrooms. They bring an organic touch and whimsical lines that beautifully contrast with the rigid angles and hard surfaces of the room. Ferns, in particular, are a fantastic choice for bathrooms due to their preference for moisture and the overall luxurious spa-like atmosphere they create. Bathroom plants not only enhance aesthetics but also promote a healthier environment. They purify the air, improve humidity levels, and elevate the overall ambiance. So, if you’re looking to elevate your bathroom experience, consider adding these green companions to your space. Trust me, you won’t regret it! Organize & Purge All The Little Stuff Ensuring a successful room refresh or makeover involves the initial steps of purging and organizing. Although it may not be the most exciting task, it plays a crucial role in establishing a solid foundation for the transformation. By clearing away clutter, you can better evaluate the space and its potential. Furthermore, decluttering alone can significantly enhance the welcoming and functional aspects of your bathroom. Additionally, consider cleaning out drawers and medicine cabinets to maximize storage efficiency. Invest in containers that can help corral both small and large items, creating a sense of order and tidiness. To add a touch of beauty to your daily routines, incorporate colorful containers or drawer inserts. These aesthetically pleasing details can elevate mundane tasks like brushing teeth or preparing for bed. Lastly, consider adding a luxurious item to your medicine cabinet. It doesn’t have to be expensive; it simply needs to be something you enjoy. Whether it’s a special face scrub or a favorite hand cream, this little indulgence can enhance your overall experience in the bathroom. Make Bottles & Containers Cohesive Decanting your shampoo, conditioner, and body wash into a matching container set is an often overlooked but highly effective method to create a spa-like ambiance in your bathroom. This simple practice not only brings a visually calming and cohesive atmosphere but also evokes the feeling of being in a luxurious hotel every time you use them.  While amber bottles add a touch of elegance, there is a wide variety of styles available in the market to choose from. Explore the countless options and elevate your bathroom experience to a whole new level of indulgence and relaxation.

10 Ways To Make Your Bathroom Feel Like A Spa Read More »

Mistakes To Avoid In Your Bathroom Renovation

7 Mistakes To Avoid In Your Bathroom Renovation

Bathroom renovation is a big project that requires adequate planning and precise execution. However, it’s not an easy task, and many DIYers and homeowners often make mistakes that end up costing them more money, time, and stress than the renovation should have.  In this blog, we will talk about the seven mistakes to avoid in your bathroom renovation project so that you can save yourself from the stress and headaches that often come with a poorly executed renovation. Don’t Make Things Up as You Go When embarking on a bathroom renovation, it is crucial to plan your project meticulously. Consider not only the must-haves and nice-to-haves, but also carefully select materials, lighting, countertops, plumbing, flooring, and color. Moreover, take into account your present and possible future needs.  Given the limited space available and the interconnectivity of fixtures with plumbing or electricity, changing your mind once the project has commenced can be challenging, costly, and at times impossible. Thus, detailed planning plays a vital role in ensuring that you stay within your budget and complete the renovation on schedule. Don’t Be Penny Wise and Fixture Foolish When it comes to bathroom fixtures, such as sinks, faucets, shower valves, and toilets, it is imperative not to compromise on quality. While the availability of these fixtures spans a wide range of costs, it is important to remember that you get what you pay for. Opting for cheap, off-brand fixtures may lead to long-term complications, damages, and the need for repairs or replacements, eventually costing you more.  Instead, consider purchasing from reputable suppliers or trusted online retailers like Build.com. While it may entail some added expense initially, investing in quality fixtures will pay off in the form of avoiding future damages and expenses. Don’t Put a Dent in the Vent Proper air circulation in the bathroom is not only more pleasant, but it also plays a crucial role in preventing the growth of mold and mildew. To ensure optimal air quality in your bathroom, it is essential to have a fan that is suitable for the size of the space and of the highest quality.  Additionally, it is important that the fan vents air outside the house, as per code requirements. Venting into a wall cavity, joist opening, or attic is considered unacceptable and can lead to multiple circulation issues and the potential for mold growth in those areas.  Collaborating with your contractor, you can create the necessary ductwork to effectively vent contaminated air outside and bring fresh air back inside, thus maintaining a healthy and comfortable bathroom environment. Don’t Immediately Pull the Plug on the Tub One aspect to consider when evaluating the functionality and aesthetics of a bathroom is the size and design of the bathtub. Some bathtubs may occupy a significant amount of space and lack the flexibility of smartly designed shower stalls.  However, before deciding to remove an old bathtub, it is important to assess the potential impact on the resale value of your home. It is worth noting that the absence of a bathtub may immediately decrease the value. As an alternative, you might want to contemplate replacing the bathtub with a more modern option.  If your budget and available space permit, an upgrade to a whirlpool or jacuzzi unit can be a suitable choice, optimizing the bathroom space effectively. Undoubtedly, such a thoughtful decision will be appreciated by your spouse. Don’t Lose Steam on the Theme Consider the considerable amount of time spent by you and your family in the bathroom. It is worth reflecting on how much this experience is influenced, positively or negatively, by an efficient, comfortable, and appealing design. It is crucial to maintain consistency and aesthetic appeal while also prioritizing the layout.  For instance, it might not be ideal for the toilet to be the first thing you see upon entering. Instead, it is advisable to ensure adequate space near the sink and tub for activities such as brushing teeth and unhindered movement. Taking these factors into account will contribute to an overall enhanced and enjoyable bathroom experience. Don’t Forget Essential Lighting Bathrooms require excellent task lighting to facilitate activities such as shaving and grooming. In addition to artificial lights, supplementing with indirect sunlight can provide a refreshing and eye-friendly atmosphere during the day.  It is important to have numerous task lights available, as well as accessible electrical outlets for hair dryers, shavers, and electric toothbrushes. Proper placement of these outlets is crucial for convenience. To enhance the ambiance, consider incorporating mood and color lighting for a stylish touch. Don’t Pile on the Tile When it comes to tiling showers, homeowners often face the dilemma of either attempting the task themselves or entrusting it to a contractor with questionable reputation or quality. However, even minor missteps during this undertaking can have severe consequences, such as substantial leaks that permeate walls and floors.  Consequently, the resulting damage can be significant and arduous to remedy, effectively nullifying any savings initially gained. Furthermore, a similar DIY approach is often adopted when dealing with fixtures like towel racks and other wall-mounted elements.  Not only does this pose a safety hazard when these fixtures are inadvertently dislodged, but it can also result in the extraction of substantial sections of the wall. Hence, it is vital to carefully consider the potential risks and complexities associated with these tasks before proceeding. Wrapping Up Your bathroom renovation journey should be stress-free, cost-effective, and give you the bathroom of your dreams. The above mentioned seven mistakes may seem insignificant, but if not given enough consideration, they can turn your renovation project into a nightmare.  Plan your budget, incorporate storage space and adequate ventilation, choose the right lighting, and hire a professional contractor to ensure the renovation process is smooth. By avoiding the above-listed mistakes, your bathroom renovation project will be worthwhile, and you will achieve the bathroom you’ve always desired.

7 Mistakes To Avoid In Your Bathroom Renovation Read More »

How To Pick A Bathroom Tile

How To Pick A Bathroom Tile? 5 Crucial Steps!

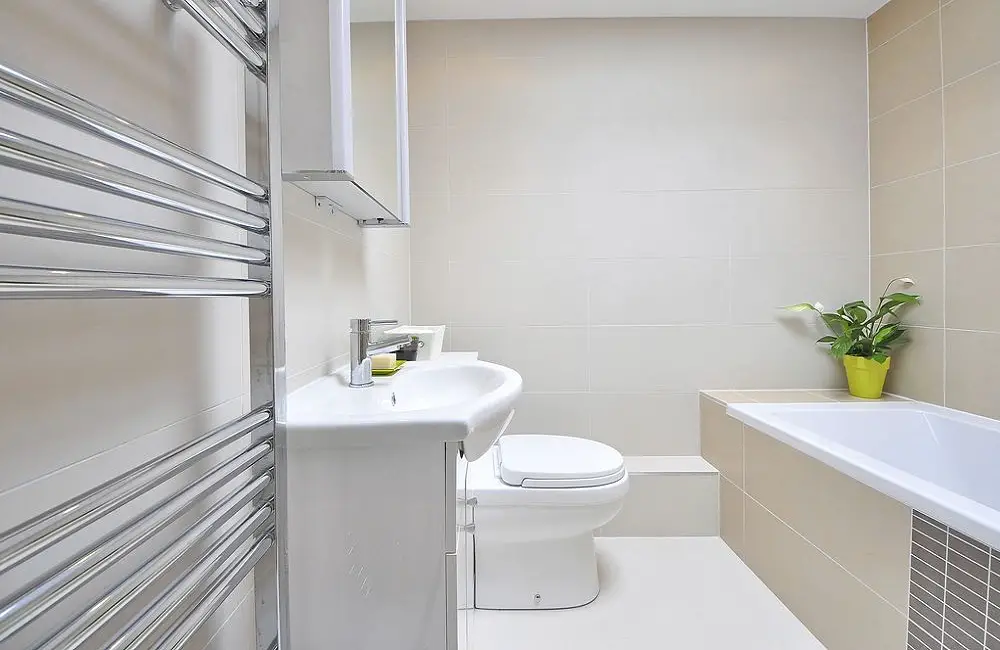
The tiles in a bathroom serve a functional as well as an aesthetic purpose. They are the backdrop for almost everything else in the bathroom, from the sink to the toilet. It’s no surprise that choosing the right bathroom tile can be overwhelming, with infinite textures, sizes, colors, and shapes available in the market. In this blog post, we’ll provide a guide to help you through the process of selecting the perfect tile for your bathroom. Decide On A Style When embarking on the quest for bathroom tiles in Perth, there’s an important step worth considering beforehand – choosing a style. The market offers an array of bathroom tile styles, colors, and design options, granting you the power to manifest the look you desire. Among the popular bathroom styles that many opt for, there is the sophisticated, minimalist appeal emanating from hotel-style bathrooms. These bathrooms embrace a neutral color palette, with black, white, and pastel shades proving to be excellent choices for tiles.  On the other hand, geometric bathrooms introduce printed tiles adorned with captivating geometric patterns, leaving a lasting impression of uniqueness and charm. Lastly, decorative bathrooms showcase a bold and vibrant look by utilizing decorative tiles, which contribute to a modern and audacious atmosphere. Understanding what bathroom style aligns with your vision will guide you in selecting the perfect tiles. It’s crucial to consider the overall style of your home and how your chosen bathroom aesthetic will harmonize with it. By carefully reflecting on these factors, you can make an informed choice that will enhance the beauty of your bathroom space. Consider Your Tile Size Preferences Before diving into the specific sizes, it’s important to consider the size of your bathroom as a whole. A large tile can make a small bathroom feel even more cramped while a small tile in a large bathroom can feel disjointed. Consider the proportions and size of your bathroom before making a decision. For a standard size bathroom, a tile size of 12×12 or 18×18 can be a safe bet. However, if you have a larger bathroom, you may want to opt for a larger tile size to create a seamless look. Small tiles, such as mosaics or penny tiles can create a unique, intricate pattern. They can also be a more cost-effective option, allowing for more design creativity. The downside is that small tiles can be time-consuming to install, and the grout lines may require more maintenance to keep clean. But, if you want a bold statement or a unique design, small tiles can create a big impact. Larger tiles, such as 24×24 or 36×36, can create a sleek, modern look. With fewer grout lines, larger tiles can make a bathroom feel more spacious and easier to clean. However, larger tiles can be more challenging to cut and install, and any imperfections will be more noticeable. Additionally, larger tiles may require a stronger subfloor, which can increase installation costs. When choosing your tile size, also consider the texture of the tile. Smaller tiles with texture can create a unique pattern while larger tiles can create the illusion of depth and dimension. If you’re using tile on the bathroom floor, choosing a tile with texture can also provide slip resistance, preventing accidents in a frequently used area. Choose No More Than Three Different Tiles To ensure a cohesive and visually appealing bathroom design, it is important to carefully select and mix tiles. When considering mixing and matching tiles in your bathroom, it’s crucial to strike a balance between creating a unique look and avoiding a cluttered appearance. Limit yourself to a maximum of three different tile types for a harmonious result. When choosing tiles, start by selecting your floor tiles first before deciding on your wall tiles. Consider how the wall tiles will complement or contrast with the floor tiles. Additionally, if you intend to incorporate accents or create a feature wall, reserve the selection of feature tiles for the final stage of your design process. In most cases, you will use wall tiles on three out of the four walls, with the feature wall serving as the focal point of your bathroom. Be mindful of maintaining an elegant and sophisticated aesthetic for your feature wall to create an attractive focal point that enhances the overall ambiance of your bathroom. Consider Your Shower Space When designing your bathroom, it is worth considering the use of different tiles for your shower area, particularly if it is a separate space. To prevent slips and falls, it is important to invest in anti-skid tiles specifically designed for showers.  Additionally, for a cohesive aesthetic, using the same tiles for both the shower floors and walls can create a seamless look. Take into account the overall style of your bathroom when choosing the tiles for your shower to ensure a complementary appearance. By carefully selecting and incorporating these details, you can achieve a stylish and functional shower space in your bathroom. Take Maintenance Into Consideration Lastly, one crucial mistake people often make when purchasing bathroom tiles is failing to consider the maintenance requirements. This oversight can prove to be quite significant as some inexpensive bathroom tiles come with hefty maintenance demands. It is always advisable to select tiles that require minimal to no maintenance, even if they come at a slightly higher price point. In the long run, this choice will prove to be more cost-effective and beneficial. Final Thoughts With these 5 crucial steps, picking the perfect bathroom tile can become a stress-free process! Determine your budget, find your style, consider maintenance, measure your space, and get samples. By following these steps, you’ll not only save time and money but also end up with a beautiful bathroom that fits your personal style and budget. Happy renovating!

How To Pick A Bathroom Tile? 5 Crucial Steps! Read More »

Why Does My Bathroom Trash Bags Smell?

Why Does My Bathroom Trash Bags Smell? 5 Tips To Get Rid Of It

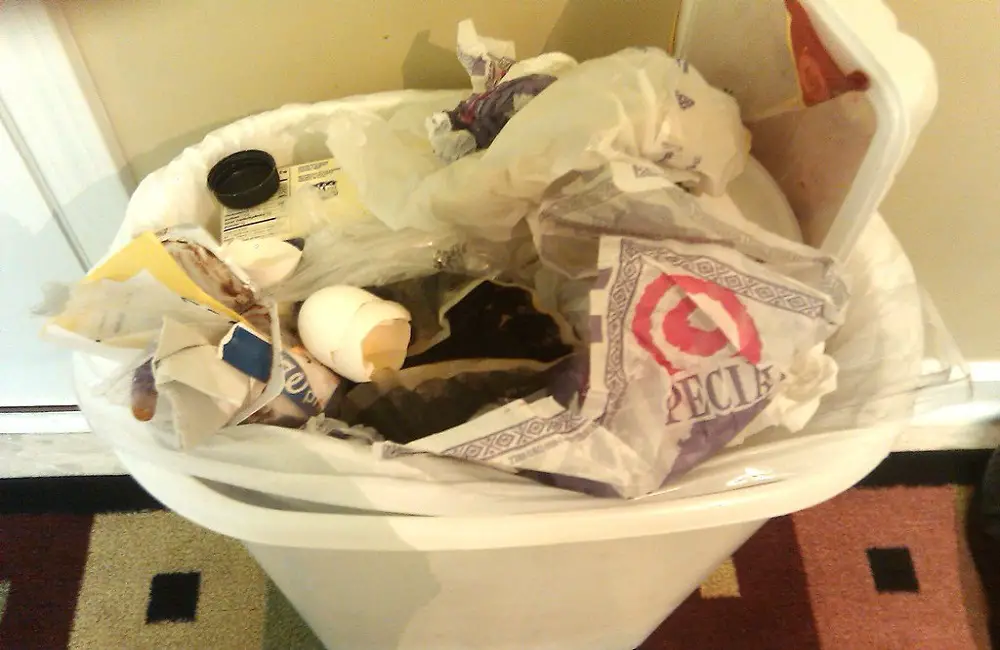
One of the most unpleasant experiences is being hit by a pungent odor. And one of the most frustrating experiences is a trash can that smells no matter how many times you empty it. To make things worse, a commonly encountered problem is a smelly bathroom trash can.  Now, this is something that you definitely do not want in your home. But why does it happen? What causes the trash bags in your bathroom to smell? In this blog, we’ll explore the reasons behind smelly bathroom trash bags and how to address the issue. Why Does My Bathroom Trash Bags Smell? Moisture One of the biggest causes of smelly bathroom trash bags is moisture. Bathrooms are naturally humid, and moisture can accumulate in the trash can. This moisture then begins to foster bacteria, which causes a smell.  You’ll be able to tell that the bacteria are building up if you notice a white film at the bottom of your trash can. The solution to this problem is to make sure that your trash bags completely dry out. Remove any lingering dampness in the trash can by wiping it out with a dry cloth. Food Waste Another reason your bathroom trash bags smell is due to food waste. Toothpaste tubes and packaging, empty toilet paper rolls, or used cotton swabs, among other things, can all accumulate in the trash.  If you leave it for too long, the food or organic matter will decay in the plastic bag, causing odors. To reduce the odor from food or organic matter, you need to take the trash out more frequently. Perfumed Products  There are some things in your bathroom that have really strong fruity or flowery scents that can cause a clash with the odor of the garbage. Bath oils, perfumes, and soaps, for example, can interact with the odor and result in an unpleasant smell.  Although it may be tempting to use air fresheners or deodorizers to remove the smell, it’s usually better to avoid using scented products altogether. Instead, dispose of the trash and other tissues in the trash can regularly. Incorrect Trash Bag Choice  The type of trash bags you use can play a huge role in determining whether or not your bathroom trash bin smells. Biodegradable or compostable garbage bags are suited for food waste.  If you’re not disposing of food waste in your bathroom trash, then these may not be the best choice. You should select a plastic trash bag that has odor-blocking properties so that strong smells from the bin cannot make it out. Poor Ventilation  Finally, a lack of ventilation can also cause a smell in your trash bag. Ensure that the lid of your trash bin isn’t airtight and the room is regularly ventilated so that a buildup of moisture in the bathroom is prevented. How Do I Stop My Bathroom Trash From Smelling? Use a Trash Can with a Lid The first step to keeping your bathroom trash smelling fresh is to invest in a trash can with a lid. This will help to contain any unpleasant smells and prevent them from spreading throughout the room. A lid also helps to keep debris from falling out of the can and onto the floor. Line Your Trash Can with a Bag Another important step is to line your trash can with a plastic bag. This not only helps to keep the trash contained, but also makes taking out the trash much easier. You can purchase scented trash bags to help keep the odor under control, or you can add a drop of essential oil to the bag before lining the can. Always Empty the Trash Can Before It’s Full A general rule of thumb is to empty the trash can when it’s around half full. This prevents the odor from becoming too overwhelming and harder to control. Additionally, it makes taking out the trash a quick and painless task. Clean Your Trash Can Regularly Cleaning your trash can on a regular basis can go a long way in keeping unpleasant odors at bay. Wipe down the inside of the trash can with a disinfectant cleaner and let it dry completely before replacing the liner. Make sure to focus on the areas where trash typically accumulates, such as the bottom of the can and around the lid. Consider Adding a Deodorizer If you’ve tried all the above suggestions and still can’t seem to get rid of the odor, consider using a deodorizer. You can purchase pre-made deodorizing options like an odor-absorbing gel or charcoal bags, or you can create your own with a mixture of baking soda and essential oils. Simply sprinkle the mixture in the bottom of the trash can before adding a new liner. Conclusion A smelly bathroom trash bag can be an unpleasant experience, but it is not a problem that cannot be solved. By taking care of the contents of your trash bag, controlling moisture and ventilation, choosing the right type of trash bag, and regularly cleaning your trash can, you can keep your bathroom smelling fresh and clean. Try these tips today and enjoy a pleasant and odor-free bathroom experience.

Why Does My Bathroom Trash Bags Smell? 5 Tips To Get Rid Of It Read More »

why is my plunger not working

This Is Why Your Plunger Is Not Working!

Unclogging your toilet can be a daunting task, but oftentimes it’s something that needs to be done quickly. And what’s the first tool you reach for?  Your trusty plunger. But what if you find yourself plunging away, only to find that the clog is still there? Don’t worry – you’re not alone. In this blog post, we’ll explore some reasons why your plunger might not be working. What Is A Plunger? A plunger is a tool that is used to unclog drains and toilets. It consists of a rubber suction cup attached to a handle, and it works by creating a vacuum that dislodges whatever is blocking the drain. When you use a plunger, the suction cup must be placed over the drain or toilet bowl and then pushed down and pulled up repeatedly to create suction. There are actually two types of plungers: the cup plunger and the flange plunger. The cup plunger is the type that most people are familiar with – it has a flat suction cup that can be used on sinks, tubs, and toilets. The flange plunger, on the other hand, has an extension on the bottom of the cup that fits into the toilet bowl drain. This type of plunger is more effective for unclogging toilets. When using a plunger, there are a few tips that can make the process more effective. First, make sure that there is enough water in the sink or toilet bowl to cover the suction cup. This will help create a tighter seal and increase suction. Second, be sure to use a proper plunging technique.  You should use a pumping motion, with short, rapid plunges, rather than long, slow pushes. Finally, it’s important to use the right type of plunger for the job. A cup plunger may work for small sink clogs, but a flange plunger is necessary for more stubborn toilet clogs. Why Is My Plunger Not Working? These are the 5 different reasons why your plunger is not working! 1. Your Plunger Is Not the Right Size It may sound obvious, but it’s important to make sure you’re using the right size plunger. Not all plungers are created equal, and using the wrong size can lead to ineffective suction. Standard plungers are generally the best type for your toilet. However, if you own an elongated toilet bowl, you may need an accordion-style plunger. 2. You’re Plunging Incorrectly Plunging is not just about brute force – it requires a technique. Make sure you’re holding your plunger upright with a firm grip. Position the plunger so the flange fits snugly inside the opening of the toilet bowl and create a seal. Use steady downward pressure to push and pull the plunger handle up and down. If you’re not using enough force or are not creating a good seal, the clog will not dislodge. 3. The Clog Is Too Large Unfortunately, a plunger can’t always fix every kind of clog. If the clog is too big, the pressure from plunging may not be enough to clear it. In this case, you’ll need to use an auger or call in a plumber to help solve your toilet troubles. 4. There’s a Bigger Plumbing Issue If your plunger is not working and your toilet continues to experience clogs, it could be a sign of a bigger plumbing issue. The clog may be further down the pipe or there may be a problem with the plumbing itself. It’s best to call in a professional plumber to diagnose and fix the underlying issue. 5. You’re Using the Wrong Plunger Type Believe it or not, there are actually two types of plungers. The first type is the cup plunger, which is typically used for sinks and bathtubs. The second type is the flange plunger, which is what most people associate with plunging toilets. If you use a cup plunger on your toilet, it won’t create enough suction to dislodge the clog. Make sure you’re using the right type of plunger for the job. How To Fix My Bathroom Plunger? If it happens that your plunger is not working, here are some easy ways to fix your plunger! 1. Check for Blockages When your bathroom plunger fails to work, the first thing you should do is try to identify what’s causing the blockage. Some of the common reasons include hair, soap scum, and toilet paper blocks. If you can’t see the blockage, you should use a flashlight and a mirror to check the drain opening. During this process, you might notice that your plunger has some debris that could be obstructing its effectiveness. In this case, use a brush or hot water to clean it thoroughly. 2. Correctly Place The Plunger The way you position your plunger can significantly impact its effectiveness. When using the plunger, you should ensure that it adequately covers the toilet’s entire drain opening. To achieve this, place the plunger’s cup directly over the drain hole and push it down towards the hole’s center. Ensure that you don’t trap the air inside the cup. 3. Add Some Lubrication If you have an older plunger model, it might require some lubrication. This helps the plunger to slide more effortlessly inside the drain, creating an effective suction. You can use petroleum jelly or any other water-based lubricant to add some lubrication. Apply the lubricant to the edge and inside the plunger’s cup before using it. 4. Use a Chemical Drain Cleaner Sometimes, a plunger may not be enough to unblock your bathroom drain, especially if the blockage is deep inside the pipes. If that’s the case, you can consider using a chemical drain cleaner. Drain cleaners come in liquid or gel form that you can pour down the drain and leave for some time. These products contain strong chemicals that dissolve the hair, soap scum, and other debris that’s causing the blockage. 5. Seek Professional Assistance If none of the above fixes work, it is best to seek professional assistance. A professional plumber

This Is Why Your Plunger Is Not Working! Read More »

How To Clean Your Bathroom Bucket

How To Clean Your Bathroom Bucket? 5 Easy Steps!

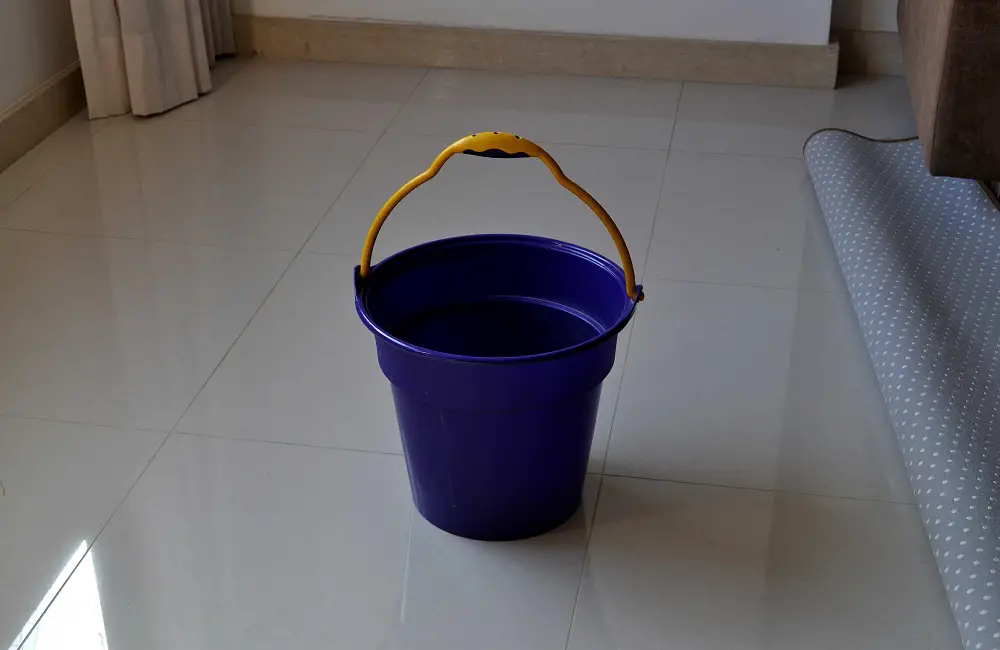
Cleaning the bathroom bucket may seem like a trivial task, but it can actually make a big difference in maintaining the cleanliness and organization of your bathroom space. The bathroom bucket is often used to carry and store cleaning products, towels, and other bathroom essentials which makes it prone to dirt, grime, and bacteria build-up.  Today, we will walk you through the essential steps on how to clean your bathroom bucket effectively and efficiently. Why Do You Need To Clean Your Bathroom Bucket? Before we proceed to the steps on how you can clean your bathroom bucket, let’s first take a look at the reason why you need to clean it.  Bathroom Buckets Harbor Germs and Bacteria Many of us carry out bathroom cleaning with a bucket to fill it with water or cleaning supplies. But what we often forget is that bathroom buckets are moist and used in proximity to germ-infested surfaces like toilets and bathroom floors, making them a potential breeding ground for bacteria, fungi, and germs.  The stagnant water in the bucket can quickly become contaminated with fecal matter, urine, and microorganisms. In order to prevent the spread of germs and bacteria, bathroom buckets need to be cleaned regularly. Dirty Buckets Can Negatively Impact Your Health A dirty bathroom bucket can spell doom for your health. Germs, mold, and mildew can multiply quickly in a moist, warm environment like a bathroom bucket. Exposure to these contaminants can result in respiratory problems, skin infections, and even food poisoning.  For those who already suffer from allergies and respiratory problems or have a weakened immune system, exposure to these bacteria can be even more dangerous. It’s essential to clean your bathroom bucket regularly to mitigate this risk. Maintaining a Clean Bathroom Bucket Is Easier Than You Think The good news is that cleaning your bathroom bucket is an easy task that can be accomplished in a few simple steps. Start by emptying the bucket and scrubbing it down with warm, soapy water. Rinse it well and dry thoroughly to prevent any moisture from remaining in the bucket.  To sanitize the bucket, use a solution of water and vinegar or bleach, following the instructions on the product label. Be sure to rinse the bucket thoroughly after sanitizing and let it air dry. A Clean Bathroom Bucket Is More Hygienic and Affordable By keeping your bathroom bucket clean, you create a more hygienic environment for you and your family. Not only does this help to prevent the spread of germs and bacteria, but it also makes it easier to keep your bathroom clean.  When your bucket is dirty, you may need to use more chemical cleaners to get it clean. With a clean bucket, you can reduce your reliance on harsh cleaning chemicals, leading to a healthier and more affordable cleaning regime. Cleaning Your Bathroom Bucket Should Be a Routine Cleaning your bathroom bucket is a task that should be integrated into your regular bathroom cleaning routine. The best way to make sure you don’t forget to clean it is by scheduling a reminder to clean your bathroom bucket once every week or two.  You may choose to clean it more frequently if your bathroom is used frequently or if someone in your household has a weakened immune system. How To Clean Your Bathroom Bucket? These are the 5 easy steps that you can follow to clean your bathroom bucket effectively! Step 1: Empty and Disassemble the Bucket First things first, make sure that the bucket is completely empty before you start cleaning it. Then, disassemble the bucket components such as the lid, handle, and any other removable parts. This will make it easier to clean all sides and crevices of the bucket. Step 2: Soak the Bucket in Hot Water and Soap Fill a basin with hot water and add some dish soap to it. Soak the bucket and its parts in the soapy water for at least 30 minutes. This will help loosen any dirt and grime that has accumulated in the bucket. Step 3: Scrub with a Brush After soaking, use a soft-bristled brush to scrub the bucket and its parts. Make sure to focus on hard-to-reach spots and crevices. If there are any stubborn stains, you can use a mixture of baking soda and water to help remove them. For tougher stains, you can also use a bit of vinegar to help break down the grime. Step 4: Rinse and Dry Once you have thoroughly scrubbed the bucket, it’s time to rinse it off with clean water. Make sure to rinse the bucket and its parts well to remove any soap residue. Then, dry the bucket with a clean towel. If you have a metal or plastic bucket, make sure to dry it completely to prevent rust or mold from forming. Step 5: Disinfect the Bucket To keep bacteria and germs at bay, it’s important to disinfect your bathroom bucket regularly. You can easily make a disinfectant solution by mixing equal parts water and rubbing alcohol or bleach. Pour the solution into the bucket and let it sit for a few minutes before rinsing with clean water. Do You Always Need To Clean Your Bathroom Bucket? The short answer is yes. You should always clean your bathroom bucket after use. The primary reason behind this is that you use the bucket to contain dirty water, which can harbor germs and bacteria. If you leave the bucket uncleaned, it can lead to bad odors and encourage the growth of bacteria and mold. Moreover, dirty buckets can contaminate your cleaning tools, making them less effective. If you’re wondering how to clean your bathroom bucket, the process is quite simple. Rinse the bucket thoroughly with hot water until there is no more soap or cleaning solution left. Then, use a disinfectant to clean the bucket and let it dry before using it again. If you’re using bleach, make sure to dilute it before using it, and wear gloves to protect

How To Clean Your Bathroom Bucket? 5 Easy Steps! Read More »

Scroll to Top